10+ Ideas for Fun Lunches with Kids

One of my favorite things about homeschooling is that I get to have lunch with my kids everyday. I love to chat about how we think the day is going and to hear their silly jokes. I don’t always eat with them (I’m sometimes feeding the baby or getting my dinner prep out of the way while we’re all in the kitchen) and I often just have a salad or smoothie myself, but I still love making lunch together an “anchor point” of our day. (See previous post about the importance of having anchor points throughout the day.)

It occurred to me that many parents are now not only facing the task of supervising their children’s education from home, but they also have to prepare lunches for their kids who are normally eating at school. So I thought I’d share some of our favorite lunches as a homeschooling family. Although I love to cook, I’ve loathed preparing lunch for a while and only recently started coming around. This has been my struggle: it’s a disruption to the flow of our day, I’m often about to hit the “early afternoon slump”, and usually I want to serve something quick. When I started to look at lunch as another valuable chance to connect with my kids and get creative in the kitchen, it became more fun. So I asked them what some of their favorite lunches are, and we came up with this list. Some of these ideas take a little more time and planning ahead, but when I have the time, they make lunch more fun. Hopefully you can glean an idea or two for yourself!

Favorite picnic/outdoor lunches:

  1. Baguettes with cheese and meat. I’ve never liked packing a picnic lunch, even though I do it all the time. Making 5 different sandwiches assembly-line style tended to get in the way of our morning routine and letting the kids make their own meant more clean up for me when we were trying to get out of the house. But the task became easier when I was turned on to the idea of simply packing a baguette, some cheese, and some deli meat and letting the kids break apart what they wanted when we eat. When I started doing this, my kids LOVED it and I appreciate the simplicity. Now it’s a lunch they request weekly. Personally, I make my own baguettes because I enjoy pushing myself in the kitchen (it’s a hobby of mine) and if that interests you, I use the Cook’s Illustrated recipe and make them a couple times a week. There are plenty of other recipes you can find online!
  2. Chicken salad wraps. Any kind of wrap or pocket, really. I’ve found that simply switching up the vessel in which I serve a “sandwich” makes lunch more interesting and appealing to my kids, and me! We love a good turkey wrap, ham wrap, or chicken salad wrap. If we’re at home, they make it themselves. I simply put out the ingredients and let them have at it. If we’re picnicking, wraps are SUPER portable which is perfect for exploring.

Favorite FUN lunches at home:

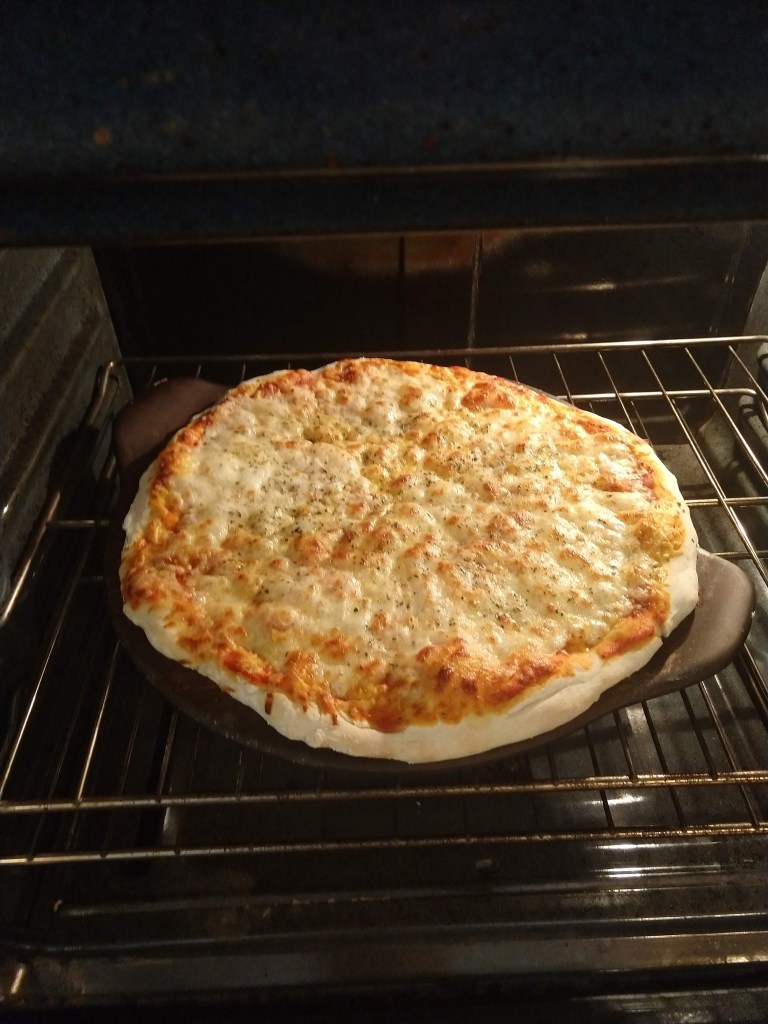
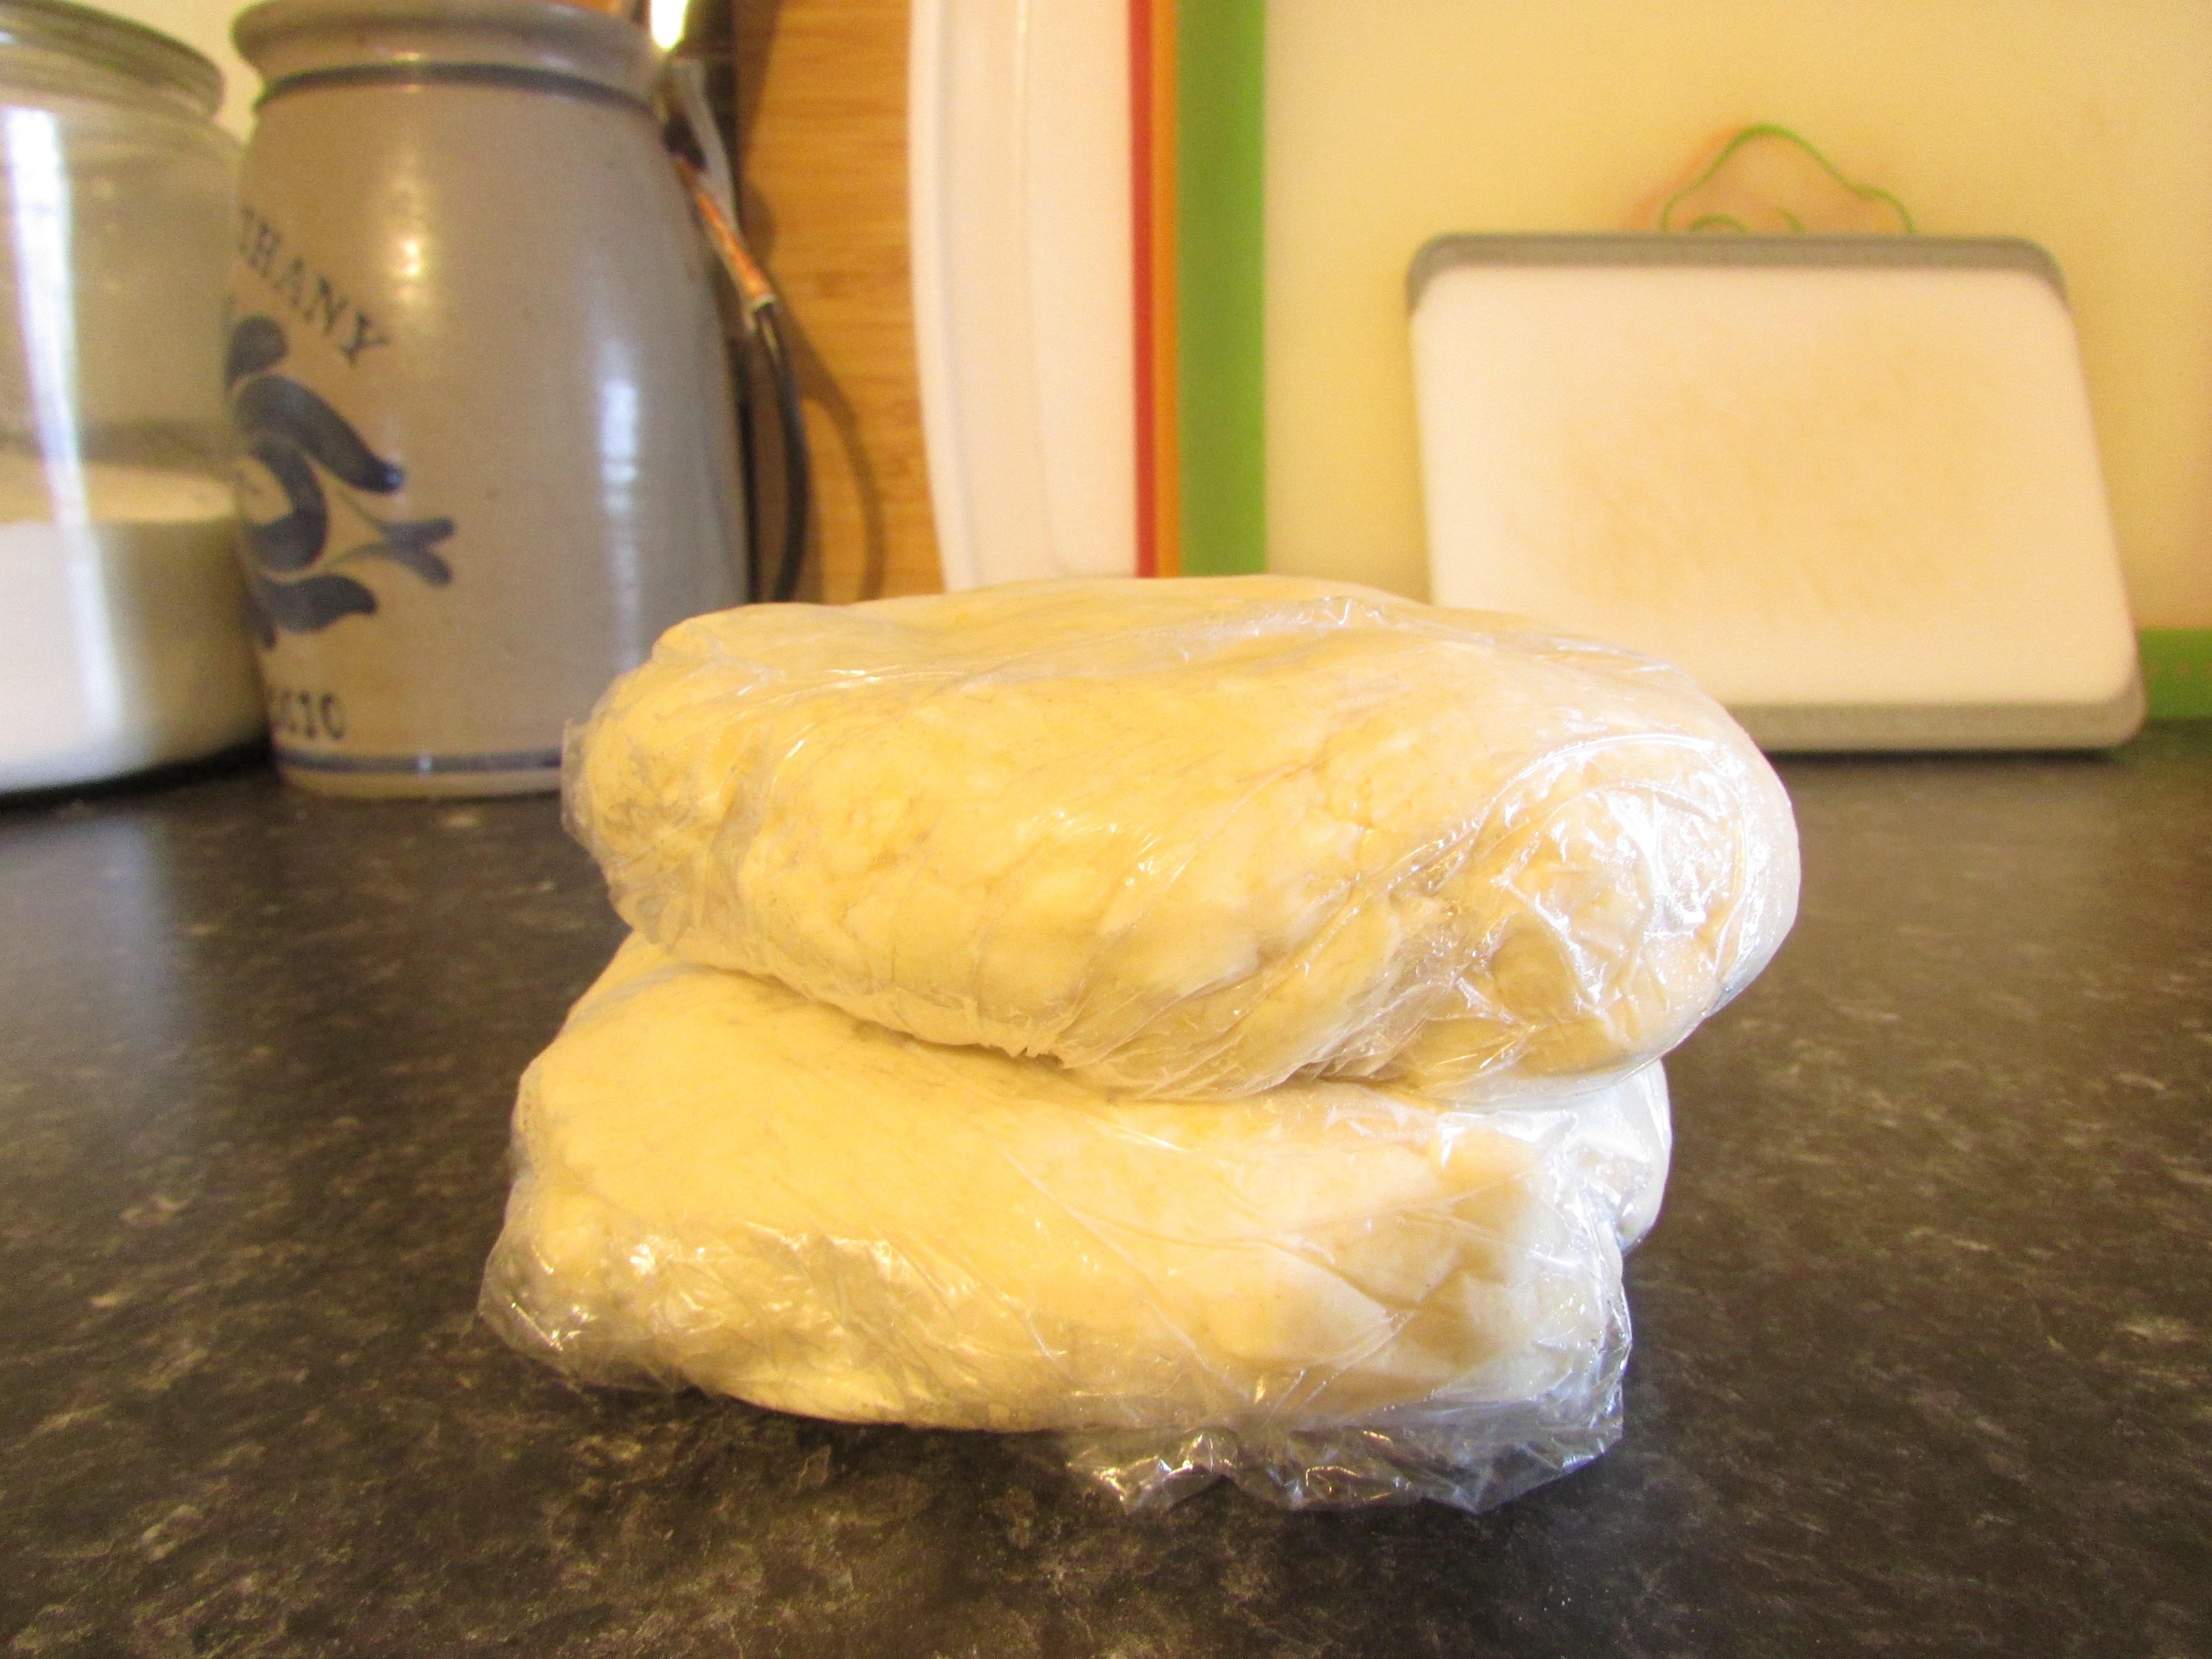
  1. HOMEMADE PIZZA! This is always a winner, and it’s easier to make than you might think. Pizza for lunch feels really special to my kids so I love to treat them to it. I make my own dough (recipe below)*, but the Pillsbury pizza crust is also tasty. A little sauce, a little cheese, throw it in the oven at 425* for 10 minutes and it’s done. Really fast lunch, and super fun! Here’s how we like to change it up…
    • Make-Your-Own-Pizza day! If we don’t have a lot on the schedule, this is a treat. We don’t do school on Fridays so it’s a good day for this if we don’t have a field trip planned or co-op (like, you know, now in quarantine world). They each get a little dough and spread toppings as they like.
    • Taco Pizza! This was an idea I stumbled upon sort of by accident about a year ago in an experiment and it instantly became a family favorite. Randy gets jealous when he hears the kids had it for lunch! To make it, I add a little taco seasoning (half a packet) to an 8 oz can of tomato sauce and use that for my “marinara.” I use the rest of the packet to flavor the beef or ground turkey as I cook it (about a 1/4 lb for one pizza). To assemble, I spread the sauce on the dough, top with Mexican cheese, and flavored meat. Bake at 425* for about 10 minutes. Once it comes out of the oven, I let it cool 2 minutes, then spread sour cream on top and sprinkle with lettuce and tomatoes and hot sauce. So good! If you don’t have taco seasoning, a combination of cumin, garlic powder, onion powder, chili powder, and paprika will do!
    • Other Topping Ideas: sausage and broccoli, sausage and peppers, pepperoni, leftover BBQ chicken, bacon/spinach/fried eggs (My kids love fried eggs on everything! Whip up a pizza with wilted spinach, bacon or pancetta, and then crack a few eggs on top with 2 minutes left of bake time. The eggs will cook in the oven and leave a runny yolk. “Breakfast” pizza!)
    • **I started making sourdough at the beginning of the year and have discovered that sourdough pizza crust is delicious and a great way to use your discarded starter. Some people have been trying this bread during the pandemic, so if that’s you, consider giving this crust a try, too! I make it once a week. First thing in the morning, I’ll separate my starter so I can feed some for a new loaf of bread and turn the rest into pizza crust for our lunch. I’ve also found recipes for sourdough pretzels (kid FAVORITE), waffles, and other goodies that are very tasty. It is such a satisfying process for a home cook and baker!
  2. Cheeseburgers and hot dogs. As the weather warms up, this is a great lunch. Even though cheeseburgers are often supper food, they’re really quick to make and the kids think they’re getting something pretty special when it’s burgers for lunch! If I’m planning on making burgers for dinner one night, I’ll often make extra patties to serve for lunch later in the week. As someone who makes 21 meals for 7 people every week, I can attest that it’s perfectly fine to repeat favorites during the same week and the buying/prepping in bulk is so economical: saves a lot of time and money!
  3. Calzones. Ask my kids if they prefer pizza or calzones and they will say “calzones.” Ask them if they prefer taco pizza or calzones and they will say they don’t want to live in a world where they have to choose. I typically make a version of Ree Drummond’s easy calzones. It’s a good amount of work for a lunch, so they can easily be prepped the night before, or just make ’em for dinner, they reheat beautifully for lunch!

Favorite Ways to Use Leftovers

  1. Rice Bowls. For a family of 7, rice is a staple. Some dinner favorites around here include arroz con pollo, pork fried rice (any Asian rice dish, really), and risotto either as a side or a main dish. When I make rice for dinner, I always make a big batch so we have leftovers for lunch. I will take the leftover rice and fry it in a large saute pan with some frozen corn or peas (and maybe some ham if I have it and there isn’t already meat in the leftover rice), and fry eggs in another pan. Everyone gets a big bowl of the prepared rice and a fried egg or two on top. They love to use the runny yolk as a “sauce” in their rice. This is seriously a lunch my kids get excited about. I turn into the “BEST mom ever!” when this is on their placemats. And all I did was reheat dinner and fry some eggs…
  2. “Anything goes” pockets. Store bought pastry dough can turn any leftover dish into a fun “pocket” or “turnover” or whatever you want to call it. Here’s a go-to example we use:
    • Take leftover mashed potatoes and mix in a bowl with leftover ham (or turkey or chicken).
    • Add some frozen vegetables (peas or corn are what I use)
    • Add some shredded cheese and season with salt and pepper. Mix well.
    • Unfold the pastry dough and cut into squares. Fill each square with the potato mixture and brush with an egg wash to help seal in the shape of a triangle. Poke a few holes in the top of the pocket to allow steam to escape while baking.
    • Place stuffed “pockets” on a baking sheet and bake at 400* for 12-15 minutes, or until dough is golden brown and cooked all the way through. Let cool! The filling will be hot, so allow time to cool before serving. These are great dipped in ranch dressing or chutney.
  3. Leftover chicken can become chicken salad. Turn it into a wrap or serve it on a salad (this might be a more favorable lunch for Mom, but my oldest will have a salad like this any day).
  4. When I make a big batch of spaghetti sauce and meatballs, some meatballs and sauce can be reserved for meatball subs at lunch. That’s a rare and therefore special occurrence around here.
  5. Crockpot meals make excellent lunch re-heaters. Some of our favorites are slow-cooker barbeque pork for pulled pork sandwiches or tacos, pulled chicken, or even slow cooker pot roast. All great next-day lunches!
  6. Tacos. I mean, either make a huge batch the night before for dinner and then leftover lunch, or just make them for lunch… tacos are amazingly easy and delicious. Enough said.

Favorite ways to re-imagine “classics”…

  1. Homemade mac & cheese. This is actually not much harder to make than a boxed mac & cheese. The longest part of either process is waiting for the water to boil and the pasta to cook. The rest is a piece of cake! And when you make it yourself, you can change up the cheese, flavoring, and additions. To make the cheese part, I start with a couple TBs of butter, melting in a pot. Once melted, add about 1/4 cup of flour. Whisk together and cook until flour is completely mixed in with the butter. I then add about 1 TB of dijon mustard, and a dollop of sour cream (not necessary, if you don’t have sour cream, no biggie, I don’t always use it, but it adds good depth to flavor). Then I quickly whisk in about 1 1/2 cups of milk and continue whisking over high heat until thickened. (The higher the fat content of the milk, the faster this will go. Whole milk is a great option.) Then I turn off the heat and add my cheese, anywhere from 1-2 cups of shredded cheese, depending on how cheesy you like it. Season liberally with salt and pepper and add in the cooked pasta (I always use a whole pound of shells, or 2 cups of elbows pasta). Done! If you want “plain” mac and cheese, use shredded cheddar jack. You can add some frozen peas or chopped spinach to get those veggies in. OR use a sharp white cheddar cheese and add in some broccoli and cooked chicken or ham. Changing up the cheese and pasta on occasion is a fun surprise for the kids!
  2. Grilled cheese and tomato soup. I have ordered grilled cheese for my kids from restaurants only to get a barely melted piece of cheese between two barely toasted pieces of bread. Forget that. This grilled cheese is ooey, gooey, and oh, so flavorful. I make this when I want a “gourmet” lunch for myself! And the kids love it because… it’s grilled cheese! In the food processor, I put whatever cheese I have left on hand (a bag of shredded cheddar is a great option, but cheese in multiple forms is a staple in this house–blocks of cheddar, gruyere, and parmesan are usually in the fridge so I often add those to the mix), half a stick of butter, a handful of spinach, a pinch of salt, and some fresh basil. Pulse until well combined. Scoop a spoonful or two between two pieces of bread (sourdough or white) and grill until melted and the bread is toasted. I also add a little shredded parmesan and chopped basil to our tomato soup–we buy the organic Imagine brand. It is so smooth and “creamy”, but no dairy. This is truly a “gourmet” soup and sandwich lunch.
  3. Instead of PB&Js, try... Peanut butter and jelly (or fluff) Ritz crackers. I also love to spread Nutella or cream cheese on these and top them with fruit. And of course, cheese and pepperoni make great cracker “sandwiches.” A variety of crackers with creative toppings is always a crowd pleaser and fills them up.

In a hurry but no leftovers…

  1. If I need to get lunch on the table fast but don’t have leftovers in the fridge, I often just put out a sampling of veggie sticks with dressing, fruit, cheese, and crackers. Separately these all make great appetizers, but served together, it can be a healthy, filling, and easy lunch!
  2. Yogurt, fruit, and granola. This is a super easy lunch and satisfies my kids, especially if they’ve had a big breakfast or a snack mid-morning.
  3. If I don’t have time to make sandwiches, it’s often better if I simply put out the deli meats, condiments, and bread. They love making their own sandwiches and they often eat the whole thing when they’ve made it themselves (ownership of creation and everything). 🙂

Next up, Fuel-Filled Breakfasts for “Homeschool” Days, stay tuned!

*Here’s my pizza dough recipe (not sourdough):

  1. Mix 1 TB sugar and 1 tsp of dry, active yeast in 1 1/2 cups warm water. Set aside.
  2. Combine 3 cups of flour, 1 tsp salt, and about 1/4 – 1/3 cup olive oil in a large bowl.
  3. Stir the water/yeast mixture into the flour mixture until well combined. Add up to another cup of flour (slowly) if needed. Knead into a ball and place in a bowl with olive oil and roll the dough in the oil. Cover the bowl and let the dough rise 1-2 hours. This should make enough dough for 2 pizzas.
Cheese pizza on sourdough crust!

Mission Accomplished: Leftovers


I’ve never been one to eat leftovers. I don’t really enjoy microwaving old food, even if it “reheats well.” But I also have a propensity to cook way too much food for a meal! (I’m hoping this trait pays off when I have 4 teenagers in the house.) These two characteristics of mine don’t exactly “gel.” Luckily, my husband has always loved eating leftovers and will feed them to the kids, too. But now that our evenings are getting busier with extra curricular activities, leftovers are becoming a regular and essential part of our dinners. Sometimes the meal can just be reheated on its own (a big pan of baked sausage rigatoni needs only to be thrown back into the oven for a bit and maybe a little extra sauce added to the mix–delish!) but other times a little creativity is needed to “transform” the leftovers into something seemingly new and exciting. I was particularly proud of last night’s transformation…

IMG_2131
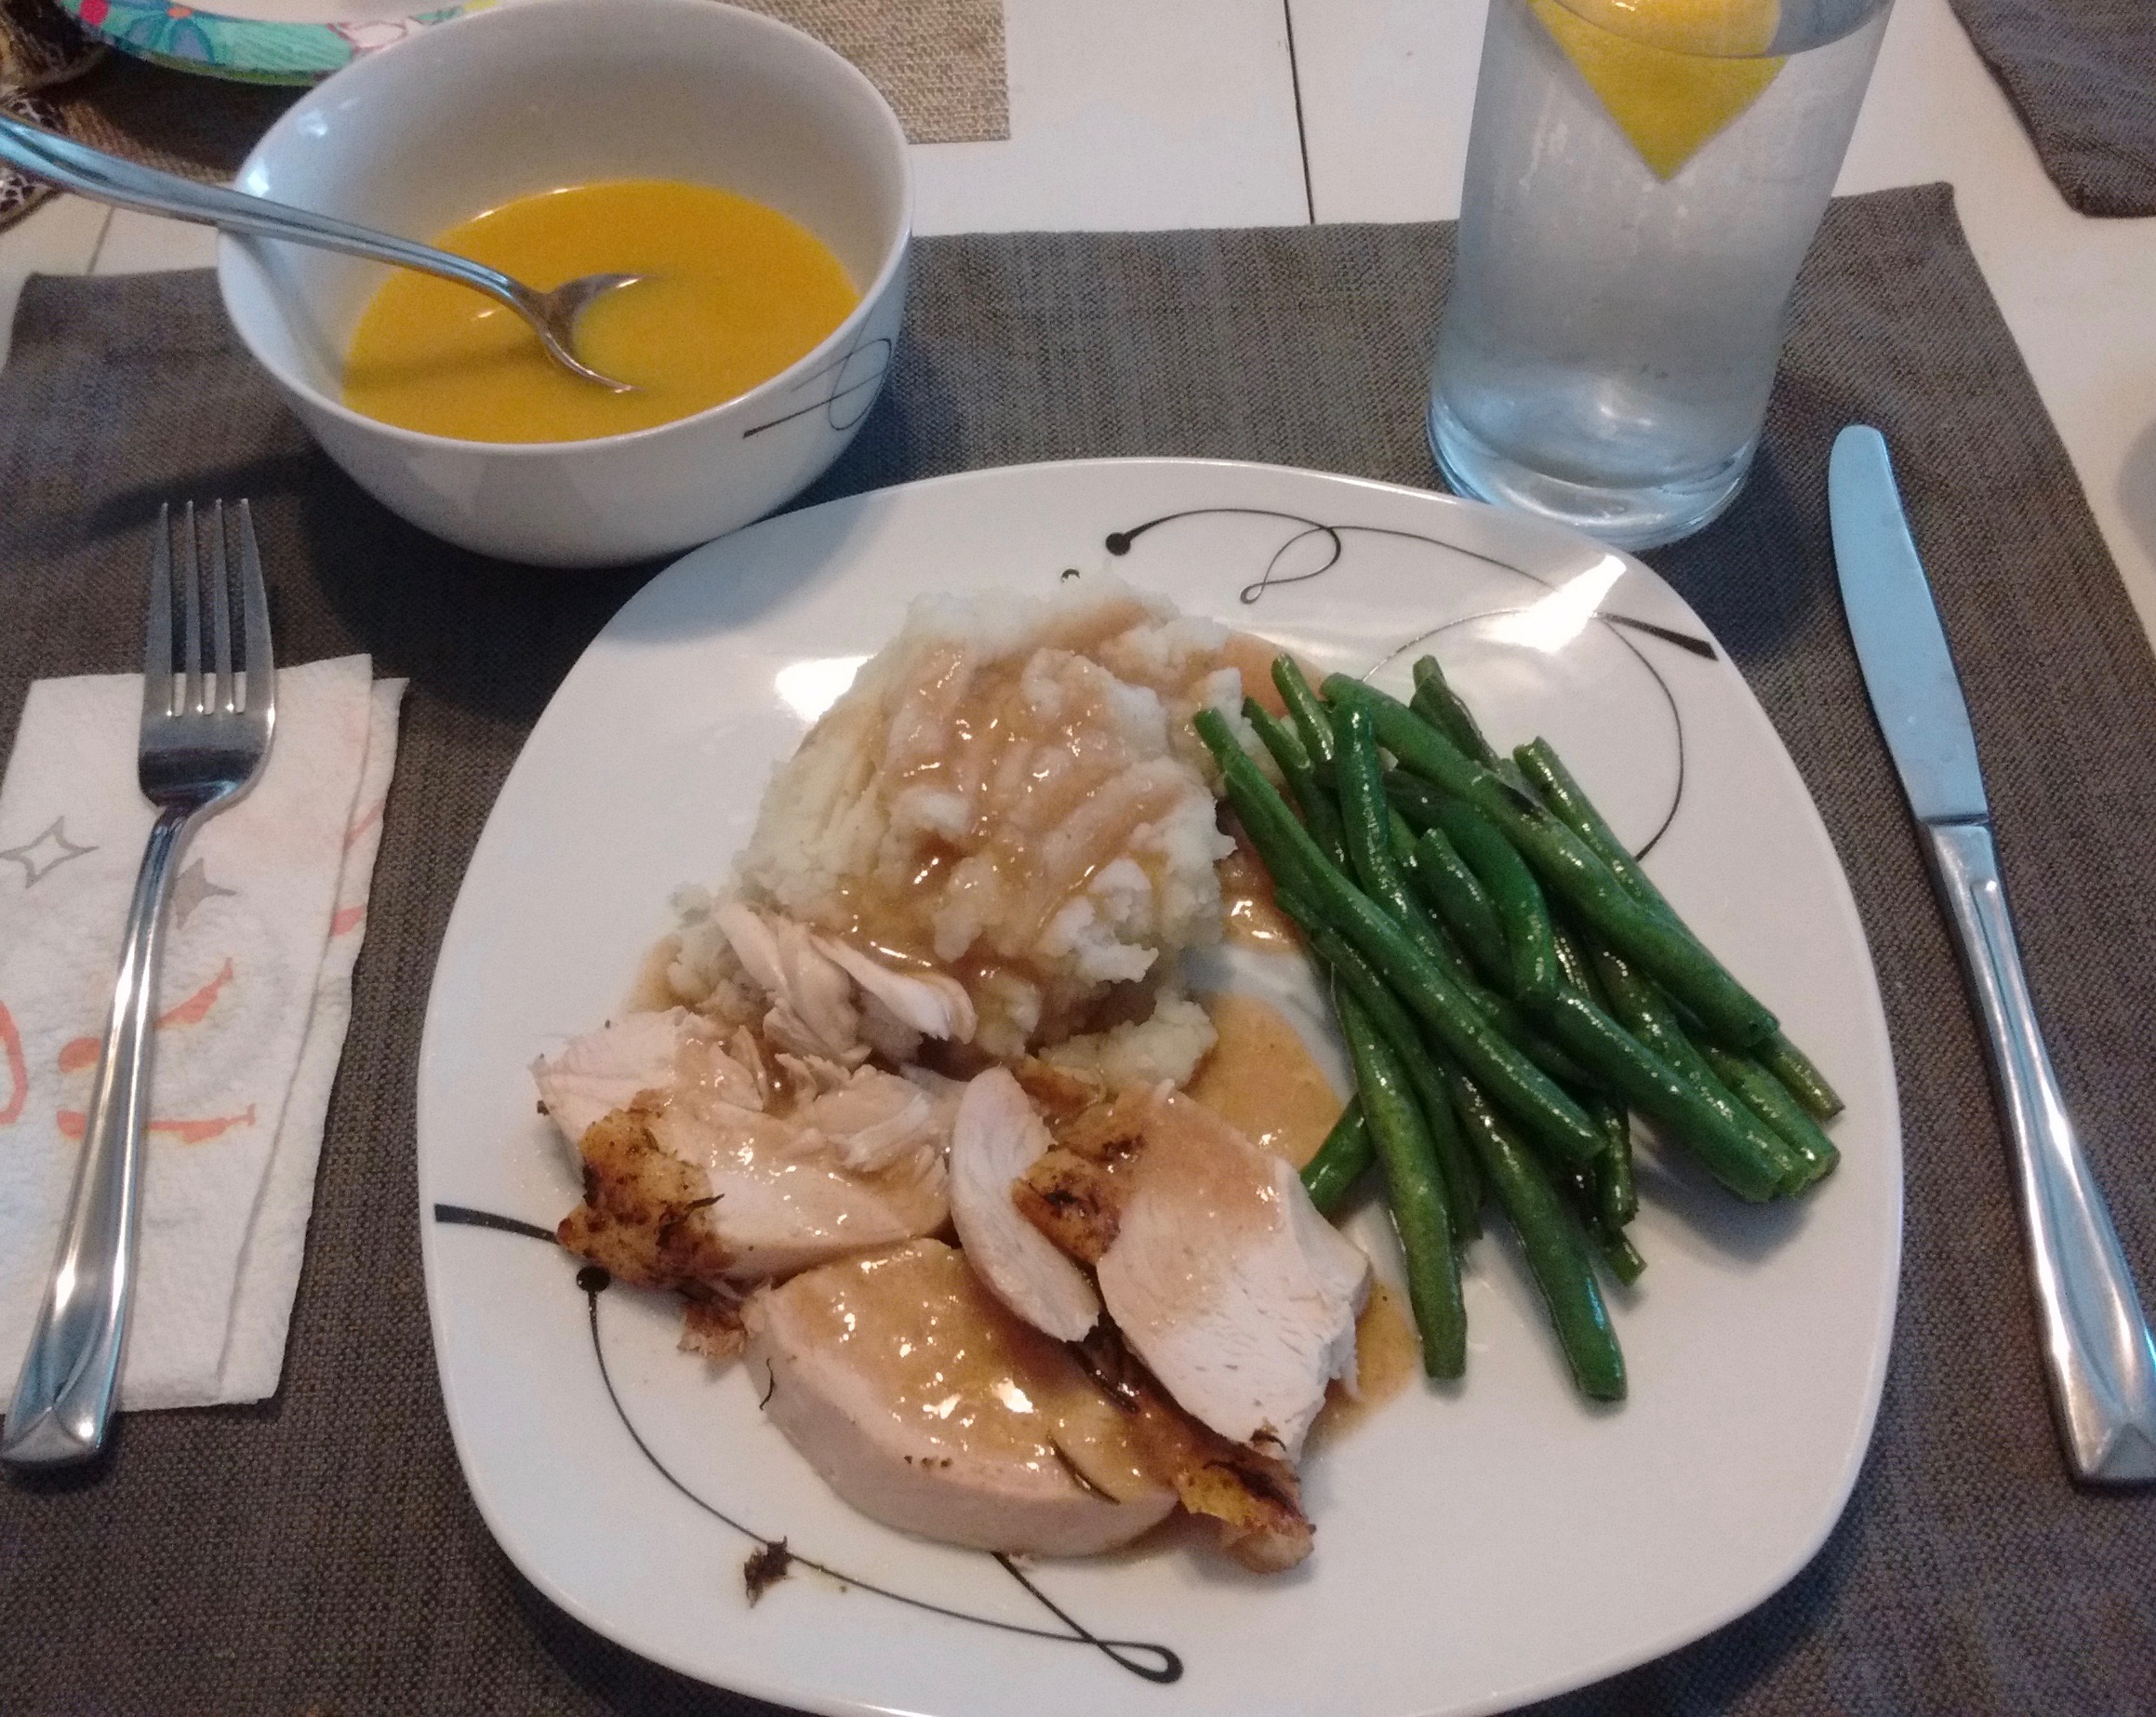
Mondays have become one of our standard leftover nights since Abby has paint class at 5:00. Sundays I like to make a big after-church dinner so I can usually get away with serving those leftovers on Monday night and my week starts out with an easy dinner. So Sunday I made a marinated pork loin, rosemary-sweet potato risotto, and balsamic broccoli. As someone who doesn’t LOVE pork to begin with, I wasn’t too enthusiastic about these leftovers. There also wasn’t enough pork to go around a full second time.

IMG_2116
I applaud the leftovers eaters of this world, truly! We need you in order to stop the food waste! I just can’t seem to get excited about this scene…

Starting with the broccoli, I dumped it into a small baking dish and added some frozen corn. I sprinkled it with a little shredded cheese, crumbled crackers, and poured some melted butter on top–voila! Baked at 375* for about 15-20 minutes and we had a small broccoli casserole. For the kids, I served this with “Cap’n Crunch Chicken Fingers” from Ree Drummond’s new cookbook (thanks again, Kristen!). I made these once before and they are an instant hit! So the kids enjoyed some chicken and broccoli for their supper.

For Randy and myself, I got a little more fancy. Risotto is a very cheesy, creamy, sticky rice. To me, leftover risotto screams RICE BALLS! So I shredded the leftover pork in my food processor and mixed it in with the risotto. Using my melon baller, I formed little round balls, about the size of small meatballs and then stuck them in the fridge to firm up. You could also “flash-freeze” them for 10 minutes or so, but I knew I had time before Randy got home from work so they’d be in the fridge for a couple hours. Then I dipped the firm balls into an egg wash, then bread crumbs mixed with parmesan cheese (you can never have enough cheese, in my humble opinion). I fried the balls in the same oil I used for the chicken fingers, which was also leftover from our sweet potato fries we had Saturday night! See, it pays to not square away your leftover oil right after use. 😉 I actually attribute my quick change in dinner plans to said oil staring me in the face Monday afternoon. Ha!

I beamed with pride as I presented Randy–who was expecting microwaved pork, rice, and broccoli–with a dinner of fried risotto balls (dipped in Thousand Island dressing) and broccoli casserole. I, myself, opted for a salad with a few rice balls on the side. I needed that burst of freshness to balance out the density of the leftovers. Still wouldn’t call myself a “leftovers” person, but I’m thinking I might have a chance at “Chopped: Leftovers!” That’s all I’m saying. 😉

A Fresh Start… (Reflections on the Whole30)

IMG_20180223_203954
Me: “Something’s been weighing on me. I need to change my diet and I’m thinking about doing the Whole30 again but I’m nervous it’ll make my milk dry up. I don’t know, maybe I should just give up sugar instead. Thinking about this is keeping me up at night.”
Randy: “If I were you, I’d give up whatever was keeping me up at night. Forget the Whole30! Do it later when you’re not nursing anymore.”
Me: “Yeah, you’re right.”

A few days later…

Me: “I bought the Whole30 book. I think I’m gonna do it. I’m going to start when Lent starts and I’ll continue giving up sugar for the entirety of Lent.”
Randy: “Ok.”
Me: “I’m hoping this just really helps me change my eating habits. I don’t feel like we eat healthy enough.”
Randy: “We eat healthy enough. Don’t ever kid yourself into thinking you don’t make healthy, well-balanced meals for this family. We eat healthy. You just got into bad habits for yourself because it’s hard to take care of yourself after taking care of 4 kids and everything else. So if you want to do the Whole30, I support you.”

So after that resounding vote of confidence (yes, I have an awesome husband) I did a lot of reading and planning, and jumped into the Whole30.

IMG_20180303_180132657My main goal in starting the program was to break my sugar addiction. It’s easy (and fun!) postpartum to start eating a lot of sweet, comforting, baked goods. People bring dinners and desserts, you snack on sweets to “ease” the burden of being so darn sleepy all the time. Feeling weary from tending to children all day long? Need a little escape? Chocolate in the bedroom. Or bathroom. Or in some corner where there are no children. I know, we all do it. But for me, it became a real problem that needed to be addressed!

I’m not the type of person who can easily say, “I’m just going to start eating less sugar” or “I”m going to start making better food choices.” I need a concrete plan with defined and measurable goals. How about 30 days with no sugar, grains, dairy, or legumes? Strict ground rules. I can follow that.

IMG_20180216_202926193
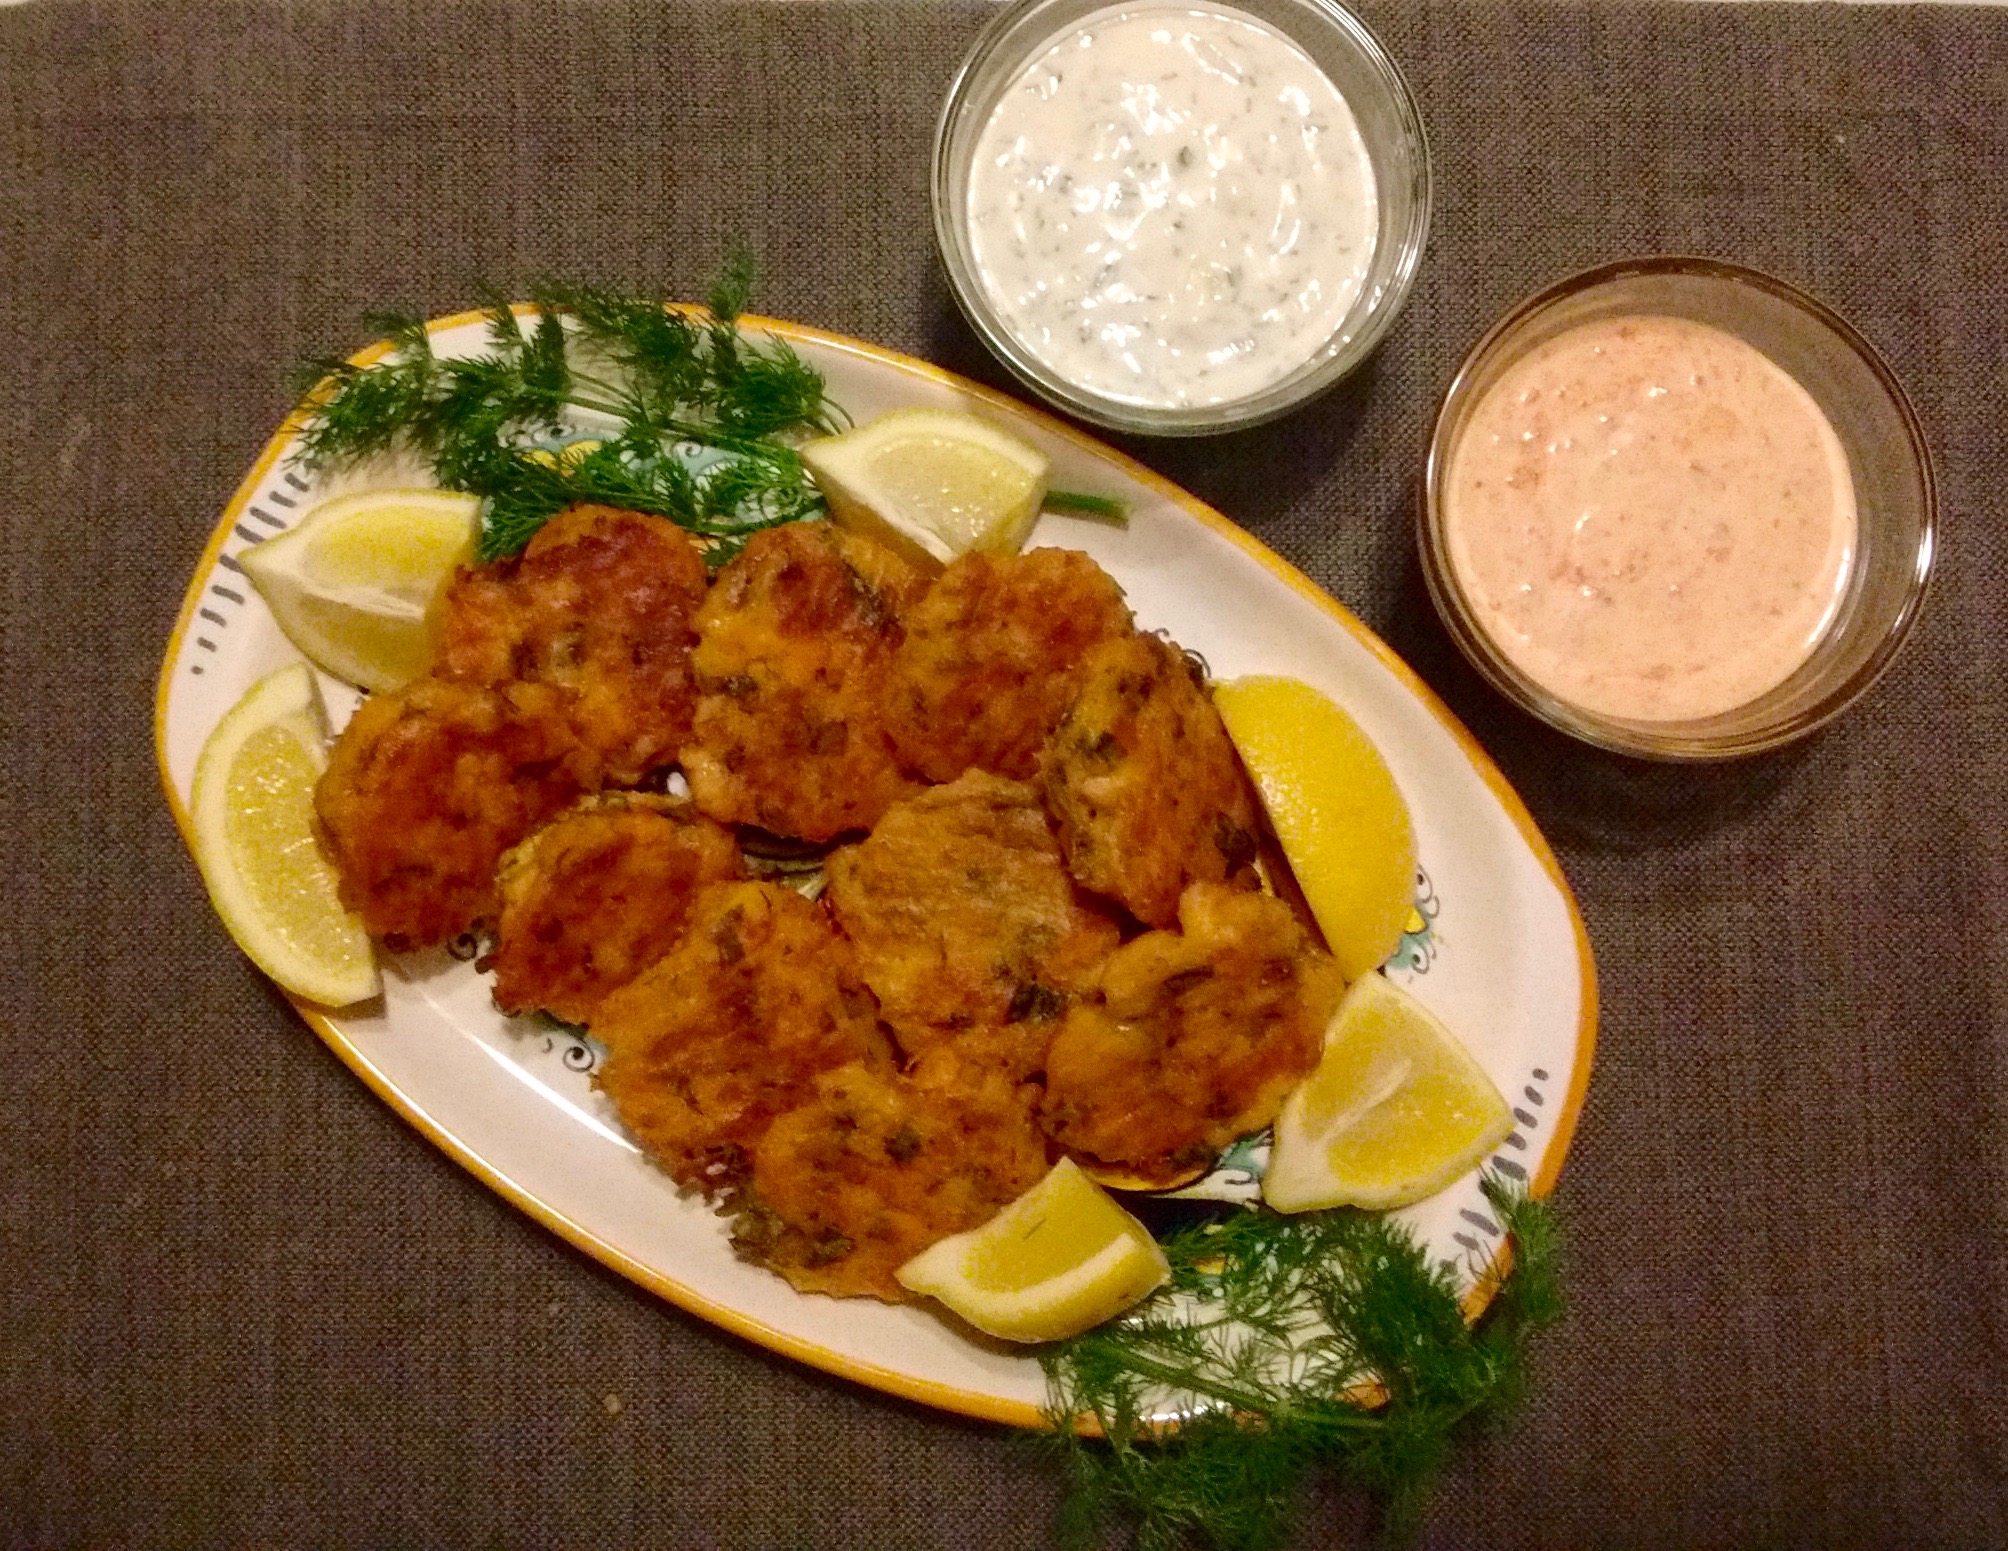
So the Whole30 means absolutely no added sugar, no grains, no dairy, and no legumes. It means reading a lot of labels. And for me, it meant a pretty drastic change. Here’s what my “food” routine used to look like:

  • cereal (no matter how “healthy” you might think cereal is, it still usually contains quite a bit of sugar) and coffee with creamer for breakfast (or pancakes, eggs, or waffles)
  • sip my “sugary” coffee through the morning because I’m oh, so tired (if there are baked goods in the house, I’ll snack on one of those, too)
  • feed my kids lunch and inevitably nurse the baby at the same time and help feed the toddler, leaving nearly no time for my own lunch
  • pick at the kids’ lunches, and/or whatever is EASY to eat all afternoon because I’m starving–i.e. crackers, cheese, pretzels, cookies, processed, prepared foods
  • eat a well-balanced dinner, but probably over-indulge because I’m hungry from lack of “real” food all day long
  • glass of wine or dessert or evening snack (as a “treat” now that the kids are in bed)
  • sip water all day long, but not enough

Sound familiar to anyone? My guess is that it’s pretty relatable to those who have young kids they’re trying to take care of. And for me, it needed to change.

IMG_20180217_122754782Being on the Whole30 forced me to prioritize my diet. I took a long, hard look at the way I was eating before and it all changed.

Nursing mothers need 500 extra calories a day. If you’re eating junk, that’s not that hard to come by. That could be an afternoon venti latte! But it shouldn’t be. Before, I may have gotten those extra calories in an “empty” form. But going on the Whole30, I had to become very intentional about eating extra food to keep up my milk supply because my calories were automatically going to decrease by cutting out the junk food. I planned out 5 small meals a day for myself and worked hard to make sure they were prepared everyday. Long story short, all was well for myself and my little man and he’s still nursing great!

IMG_20180216_204247222Now let’s talk about the emotions of it. It’s hard for me to deprive myself of something without feeling sad or almost indignant… I’m an adult, after all! I should be able to eat what I want, when I want! So I decided to think of this experience instead as a food adventure. In purchasing the Whole30 book, I instantly had about 100 recipes at my fingertips of different foods I might not otherwise attempt to make or try. I ended up having so much fun trying out new recipes and making my own dips and dressings, although it was a lot of work. This way of thinking helped me not feel as “deprived” of the foods I love.

So I made it through the 30 days… the results? In addition to my milk supply INCREASING and feeling so much better about the quality milk I could feed my baby, I, myself started feeling much better overall. Not to mention, I lost 22 lbs! I learned that I CAN make the time to prepare a healthy lunch for myself and I need to; it prevents me from feeling hungry in the afternoon and snacking so much. I learned that I CAN make yummy treats for my family and friends without having to overindulge myself. (THAT was hard, believe me. But I did it!) I have rekindled my love of black coffee! I used to drink my coffee black until I started having kids and wimped out. I still love my creamer, but I don’t think I’ll be as dependent on it anymore. I can now whip up a morning egg for myself in no time and that can be a great alternative to cereal, even on a morning when I’m in a hurry. And instead of sipping coffee all morning long, I more quickly switch to water and then make myself a smoothie as a morning snack for an extra dose of fruit and spinach. And THAT’S a much better way of getting those extra nursing calories I IMG_20180218_131700198need!

And now that the 30 days are up, where do I go from here? While losing weight wasn’t my primary goal, it certainly is a pretty nice perk! I know I’ll probably gain some of it back once I start adding in my precious pasta, cheese, and the occasional sweet, but the goal is to maintain some level of what I accomplished these past 30 days. I’m still off sweets through the remainder of Lent, so that’s a start. I’m keeping my favorite Whole30 meals in my recipe rotation for weeknight meals, and going to continue making good lunches for myself. I’ll be cutting way back on sweets and evening snacks as I’ve come to appreciate a nice cup of tea, instead. And while a strict workout routine is hard to stick to with a baby in the house (because I love my sleep and already am not getting nearly enough), I am keeping at it as much as I can. And I’m totally stoked about a Fitbit Challenge coming up through Randy’s work which we can both participate in for a cash prize at the end of 60 days! We get to keep our Fitbits, too!

IMG_20180307_172910855Will I ever do the Whole30 again? Maybe! I’m certainly not intimidated by it anymore and I’m proud of what I’ve accomplished in retraining my thinking about food as a “reward” or “escape” from crazy kids. 😉 But now that it’s over, the real test begins… wish me luck!

Considering doing the Whole30 for yourself? Here are some of my tips:

  • Buy the book! I didn’t mention this above, but I attempted the Whole30 twice before and failed both times, for different reasons. And while both reasons were very valid and easily justified, I think not having the book to help guide me through was a contributing factor to making it easy to quit.
  • Make a plan! Plan out all your meals, and also have a plan for what you’ll do when you REALLY want a treat that you can’t have. For me, it was helpful to constantly have fresh fruits I love and nuts at my fingertips for snacking. 
  • Buy some “replacement” items for fats and seasonings you would otherwiseIMG_20180302_212403374 use but now can’t. I recommend: making your own mayonnaise and keeping it on hand, having balsamic vinegar, ghee or clarified butter, coconut aminos (replaces soy sauce and is a great flavor addition to many meals), and dry mustard (goes in many DIY dressings for salad). You’ll also want plenty of onions, garlic, ginger, lemons, limes, and herbs throughout the Whole30.
  • Be ready for the “yucky” feeling in the beginning if this will be a more drastic diet change for you. It will pass. You’ll get through it!
  • Pregnant or nursing and want to do the Whole30? Again, buy the book! If you’re pregnant, you need to be careful about eating too much protein, and the book has some great suggestions. Nursing? I planned out 5 meals a day to ensure that my calorie intake would be ample enough but about a week in, I gave up the extra two meals and found it sufficient to just snack on fruit and vegetables instead of having a full-on second lunch, etc. I had Fenugreek seed on-hand (helps milk supply) and started taking it around week 3, but only took it once a day instead of 3x a day and I found it helped enough. And now I don’t need to take it anymore. I also made sure to get my multi-vitamin daily as well as a fish oil supplement (Randy and I have always taken one anyway) which is really beneficial while nursing, too!

IMG_20180214_180651192


5+ Ways To Do Vitamin-Rich Veggies in Winter…

Winter is in full swing and although I wish it were almost over, we’re only about half-way through! It can be hard to continue finding creative ways of incorporating fresh vegetables during this time but we know how important it is during flu-season to make sure we get those vitamin-rich foods in our diets! So I’ve assembled some of our favorite ways to eat our veggies in the winter and maybe some of these recipes will give you a mid-winter “boost” in your day to day dinners! 🙂

(By the way, this post contains NO advice on how to get your kids to actually eat their vegetables. I wish I was an expert on that! But I will say that presenting them pleasantly and flavorfully goes along way in our house! I’ve also found that serving dinner “family-style” and letting the kids scoop their own food themselves from serving dishes on the table seems to motivate them to eat more of their food.)

Here are some vegetables that offer powerful vitamins and nutrients to your diet and some yummy ways to serve them up…

KALE is very rich in vitamins K, A, and C (hello, immune booster)! It’s also a great source of fiber, calcium, and iron. Besides chopping it up and throwing it in a fruit smoothie, we love to have it in a sausage-and-kale-strata (follow the link for the recipe) for breakfasts and zuppa toscana, one of our favorite soups! I chop the kale up pretty fine for both of these dishes because I have small children so it’s easier for them to handle. Plus, the finer it’s chopped, the harder it is for them to pick it out of anything! 😉

IMG_0688SPINACH is very similar to kale in the nutrients it provides, but offers a little less vitamin C and more iron, actually. Both of these leafy greens are great raw in smoothies and salads. When I cook them, I prefer to cook them IN a dish so no nutrients are lost in the form of steam or boiling water. Spinach is a great substitute for kale in that strata recipe (just like you could swap bacon or ham for the sausage). I also love to chop spinach really fine and add it to lasagna, stuffed shells, or calzones. This tortellini soup is a really good winter warm-up and is excellent served with xButtermilk Cheddar Biscuits!

Here’s a fun grilled cheese to try: mix a bag of cheddar jack cheese, a half stick of butter, a couple handfuls of baby spinach, and a few leaves of basil in the bowl of a food processor. Pulse until the mixture comes together. Spread this mixture between two slices of bread and grill as usual. This is an amazing accompaniment to tomato soup (which is also rich in vitamin C!) and as long as your kids can get past the “green” cheese that results, the whole family will love it! It’s our favorite way to have grilled cheese!

BROCCOLI is rich in vitamins K and C and fiber! According to “World’s Healthiest Foods” it’s also a great anti-inflammatory. I often put broccoli in a strata as well, in place of kale or spinach. We LOVE broccoli cheddar soup and it’s great in a stir-fry. But beyond those things, broccoli is probably one of my favorite vegetables to serve as a side and I do it a couple ways:

Prepare a balsamic vinaigrette by whisking together one minced clove of garlic, a dollop of dijon mustard, 1-2 teaspoons of balsamic vinegar, and some drizzles of extra virgin olive oil. Steam, roast, or par-boil your bite-sized broccoli and then add it to the vinaigrette when cooked. Squeeze a half of lemon over the hot broccoli and season with salt and pepper, then mix in with the vinaigrette so all the flavors are incorporated. My kids DEVOUR broccoli when it’s prepared this way!

When I want a FRESH side, I’ll simply steam my broccoli and then squeeze a lemon over it and season well with salt and pepper. Or simply add some sesame oil or soy sauce to it if you’re serving it with salmon or other seafood.

Here are some other side dish options:

Cooked brussel sprouts with bacon and apple “ju.” Slice up some bacon and start frying the “bits” in a cast iron skillet. Slice sprouts in half and add to the cooking bacon and season with salt and pepper. In a separate pan, reduce about a cup of apple juice and 1-2 TB apple cider vinegar or red wine vinegar (whichever you have on hand) by boiling them together in a pan for a few minutes until the mixture is reduced by about 1/2 and then pour the ju over the brussel sprouts.

SWEET POTATOES are another super-food rich in vitamins A, C, and others, as well as beta-carotene. We enjoy the traditional mashed sweet potato with some butter, a little orange liqueur, brown sugar, cinnamon, and nutmeg. But our all-time favorite way to enjoy these healthy roots are in fry-form! We have sweet potato fries almost once a week and our kids ask us to have them more often than that! We peel and slice our sweet potatoes into fry “sticks” and then I soak them in cold water for a little while. (1 hour or longer is recommended for crispy fries.) Then I dredge ours in a mixture of 4 parts flour, 1 part corn meal, seasoned with seasoned salt. Fry in canola oil until golden, then remove to a paper towel-lined bowl. These are great dipped in a mixture of mayonnaise and barbecue sauce!

Hope these ideas and recipes inspire you! Maybe they’ll appeal to those picky eaters in your life, too… 😉

Peppermint Mocha Cookies

IMG_1873

Any dessert that can be turned into a cookie is okay by me! Originally, this was just going to be a peppermint chocolate cookie. I got the idea because I wanted a special cookie to make for my kids while we watched The Polar Express. But those plans changed even though my cookie-making plans did not! This Christmas I’ve decided we’re not doing any sort of “special” school or prepared advent devotional for homeschoolers (though I am doing an adult one just for myself). I just can’t stress myself out with any added homeschool activities this year. I have four kids at home including a newborn and I work part-time. So this Christmas I’m giving myself a break from “special” school and as many outside activities as possible and we’re simply relaxing. To us, this means baking, watching movies, and reading books! One of the best gifts I can give my kids this year is a stress-free Mama! Without the agenda of feeling like we have to do an activity or Christmas lesson everyday, we are free to let the days come as they may and do what we please. So today, it pleased us to make some cookies and watch a movie (though not The Polar Express because we decided we’re watching that in our pajamas on Saturday morning with Daddy). 🙂

So as I set out gathering the ingredients for what I envisioned to be peppermint chocolate cookies, I spotted the instant coffee granules in the pantry with the rest of my baking items. Since coffee enhances the flavor of chocolate, I picked up the canister. I wasn’t fully committed to using it yet, but I took it out just in case. Then, while I had the kids adding and stirring the other ingredients, I suddenly decided to add a tablespoon of instant coffee. We were now making MOCHA cookies, not just chocolate cookies. A-MAZING. I had no idea how this idea would really play out, but who cares? We’re stress-free this year, right?! I let all three kids plus myself test out the cookie dough and I could taste the coffee so distinctly that it actually reminded me of a mocha latte. I instantly knew these were a hit and couldn’t wait to try the final product.

These peppermint mocha cookies are so yummy! They will make a great addition to your holiday cookie repertoire. I actually made a maple pecan coffee to enjoy with mine, but they’ll go great with any latte or a glass of milk or eggnog! (The Ninja Coffee Bar recipe book has a great recipe for “coffee nog” that is delicious and is a great pair with ANY cookie, but especially ones with a hint of coffee!)

  • 2 cups flourIMG_1876
  • 1/4 cup cocoa powder
  • 1 tsp salt
  • 1 tsp baking soda
  • 1 tsp baking powder
  • dash of cinnamon
  • 2 sticks butter, softened
  • 1 cup brown sugar
  • 1/3 cup granulated sugar
  • 2 eggs
  • 1 tsp vanilla
  • 1 TB instant coffee
  • 2 cups chocolate chips
  • crushed peppermint candies

Sift together the flour, cocoa, salt, baking soda, baking powder, and cinnamon and set aside. Cream the butter and sugars together and then add the eggs, vanilla, and instant coffee. Add the dry ingredients to the wet ones and mix thoroughly. Stir in the chocolate chips. Place dollops of dough on baking sheets for the cookies and bake at 350* for about 10 minutes. As soon as they come out of the oven, sprinkle the crushed peppermint on top so it sticks to the hot cookies.

Here’s the printable! peppermint mocha cookies

Pumpkin Cheesecake with Candied Pecans and Homemade Caramel Sauce

10801666_10155062170015221_7583895898096585140_nThanksgiving is the food holiday. We all know this. It is the quintessential day for cooking, baking, and eating all sorts of autumn foods. It is the ideal holiday for me to host because I LOVE to cook and bake and I love fall. The problem is, I don’t have a house big enough to host my whole family… yet. But my husband and I have always said that when we buy our next house, it will be big enough to host Thanksgiving. That’s one of our essential criteria. I did host one year when we had a “fluke” year and the whole family couldn’t be together. I loved it. People came and went and we got to see lots of friends and family for different parts of the meal. It was fabulous. But I still long to host my entire family for a beautiful Thanksgiving feast.

Until then, I enjoy experimenting with different recipes for my “would be” Thanksgiving. And instead of having one big meal where we stuff ourselves too full to really appreciate all the aspects of the feast, I try something new here and there and we break it in with a simple meal where we’re already familiar with the other components. Then we can really appreciate and critique the new recipe. We have Thanksgiving “month” in a way. Here is one of the recipes I tried lately. We love ourselves some good cheesecake so why not make it pumpkin? And I frequently make homemade caramel sauce, so why not combine the two? I added the pecan component in the crust and topping because it’s another flavor of Thanksgiving and one of my favorite nuts. So if you’re looking for something different to try for your Thanksgiving dessert, look no further! It got our stamp of approval! And although I’m not in charge of dessert this year, my mom is and after she tried this cheesecake at our house, she decided she’s going to make it so I passed along the recipe.

I so wish I had a good picture of it, but I don’t. A new camera is on my Christmas wishlist! 😉 Just close your eyes and imagine the cool, creamy cheesecake filling in a nice, crunchy crust just dripping with luscious caramel sauce and toasted pecans! The handy printable is at the end of the post for your convenience.

Crust:

  • 1 cup graham cracker crumbs
  • ¾ cup pecan crumbs
  • 3 tablespoons light brown sugar
  • 1/2 teaspoon ground cinnamon
  • 1 stick melted salted butter

Filling:

  • 3(8-ounce) packages cream cheese, at room temperature
  • (15-ounce) can pureed pumpkin
  • 3 eggs plus 1 egg yolk
  • 1/4 cup sour cream
  • 1 1/2 cups sugar
  • 1/2 teaspoon ground cinnamon
  • 1/8 teaspoon ground nutmeg
  • 1/8 teaspoon ground cloves
  • 2 tablespoon all-purpose flour
  • 1 ½ tsps vanilla extract

Salted Caramel Sauce:

  • 1 cup butter
  • 2 cups brown sugar
  • 2 cups heavy cream
  • 2 tsps vanilla
  • ½ tsp of kosher salt

Pulse the graham crackers and pecans in a food processor until ground together. Add the brown sugar, cinnamon, and melted butter and pulse until combined. Press into the bottom of a greased 9” spring form pan.

Whip the cream cheese until soft and smooth. Add the pumpkin, eggs, sour cream, and sugar and whip until combined. Add the cinnamon, nutmeg, cloves, flour, and vanilla and whip together until smooth. Pour over the crust.

Cover the bottom of the pan with aluminum foil and wrap it up the sides of the pan. Place it in a water bath of warm water and bake at 350* for an hour and a half, or until baked through.

For the caramel sauce, start by melting the butter on the stove in a medium saucepan. Add the brown sugar and stir until smooth. Add the heavy cream and simmer (stirring occasionally) for about 10 minutes, or until thickened. Add the vanilla and salt and let cool.

Toast some pecans in a skillet on the stove. Pour over some of the caramel sauce to “candy” the nuts. Cook down for a few minutes. Pour the pecans (and extra caramel) over a slice of cheesecake!

Here’s your printable: pumpkin cheesecake

August 15 — recipes of summer

The other night we pretended to be southern and indulged in fried chicken, corn on the cob, green beans, potato salad, and buttermilk biscuits for dinner. And we couldn’t finish half of it. It’s still somehow hard for me to learn to not cook so much some nights! I’m sure in about 10 years I’ll have to cook that much since we’ll have four “teens” in the house, but in the meantime, there’s leftovers. And biscuits and gravy for breakfast! I’ve been boldly frying chicken for a few years now and I haven’t strayed from Ree Drummond’s recipe (though I don’t have to look it up anymore). The chicken comes out golden and crispy every time and thoroughly cooked and juicy! There’s something about standing in the kitchen and frying chicken that makes me feel like life’s simpler than it is. And my kids LOVE it, which is always a good thing! We mix honey and butter to smear on the biscuits and we’re instantly transported to another place and time as we sit around the dinner table talking and eating with our hands. Even though this meal heats of the kitchen pretty well, I still feel like it’s a summer meal.

We’ve been eating some good summer food around here, lately, and getting creative with our summer beverages! I’ve been wanting to try a new drink for some time now and finally Randy and I made the latest coffee craze for ourselves–maybe you’ve heard of it.  Imagine combining iced coffee and lemonade?! Yep. Try that and you’re officially “hip.” 😉 Here’s how it worked: I combined our iced coffee (leftover and refrigerated from our morning pot–but you could also use cold brew, and what would probably be better is a cold brew espresso or something nice and strong), the juice of one lemon, some sweetened condensed milk, and topped it off with some club soda. It was actually pretty good! It was a coffee version of the “spritzer” drinks we’ve been having all summer. I served it alongside some lava cakes I’d been dying to make so we could have a “special” evening. Typical Wednesday night around here. 😉

IMG_1683
I first read about this new trend in a magazine and ever since, I’ve seen it pop up online here and there. Worth a try!

With summer slipping away (I know, say it isn’t so!), I felt compelled to make a berry pie before the season is completely gone. I feel like it’s the quintessential summer dessert and I couldn’t believe I had let so much time go by before actually making one! Here’s the thing, with three small children and pregnancy fatigue getting to me, it’s not easy to slip into the kitchen and bake something for fun. Whenever I watch one of those cooking shows, I always wonder why I feel jealous of the person I’m watching cook–it can’t be because I don’t know what I’m doing in the kitchen, because I do! And I think I have a pretty good set up and equipment, so what is it that makes me long to be inside that show and not cooking in my own kitchen??? Oh yeah, it’s the fact that I always have kids running around me making it nearly impossible to concentrate! 😉 So when my parents offered to take the two older kids out for the afternoon while the one-year-old napped, I knew what I would be doing with my free time–baking a pie! And not-so-amazingly, it took way less time to accomplish than I’m used to! Ah, the magic of kid-free kitchen time! So I concocted this recipe for a Triple Berry Pie and served it with homemade vanilla ice cream. So delicious! So summer!

For the crust:

  • 2 1/2 cups flour
  • 1 TB confectioners sugar
  • 3/4 cup cold butter
  • salt (just a pinch)
  • 1 egg
  • 2 tsps vinegar
  • 1/4 cup cold water

Combine the flour, sugar, salt, and butter in a food processor and pulse. Add the egg, vinegar, and water and continue to pulse until the dough comes together. Divide into 2 disks and wrap both in cling wrap and place in the refrigerator for at least one hour.

IMG_1667

For the filling:

Combine 1-2 pounds strawberries (de-stemmed and halved), 1 pint raspberries, and 1 pint blackberries. (You can adjust amounts based on your personal berry preference.) 😉 Add about a cup of sugar and let sit in the refrigerator for an hour. (This will allow the juices to come out of the fruit and can be drained off for a less soupy pie.)

Drain the juice from the fruit and then add a 1/2 cup of sugar, the zest and juice of 1 lemon, 3 TBs tapioca flour, and sprinkle in some cinnamon. Mix well.

Roll out one of the dough disks and place in a pie pan. Pour in the fruit filling. With the second disk, I like to roll it out and cut strips to weave together a lattice top crust.

Once the pie is assembled, brush it with an egg wash (combine 1 egg and a little water), and sprinkle with sugar. Bake at 425* with a foil collar for 30 minutes, and then remove the collar, reduce the heat to 375*, and continue baking for another 20-30 minutes.

IMG_1679
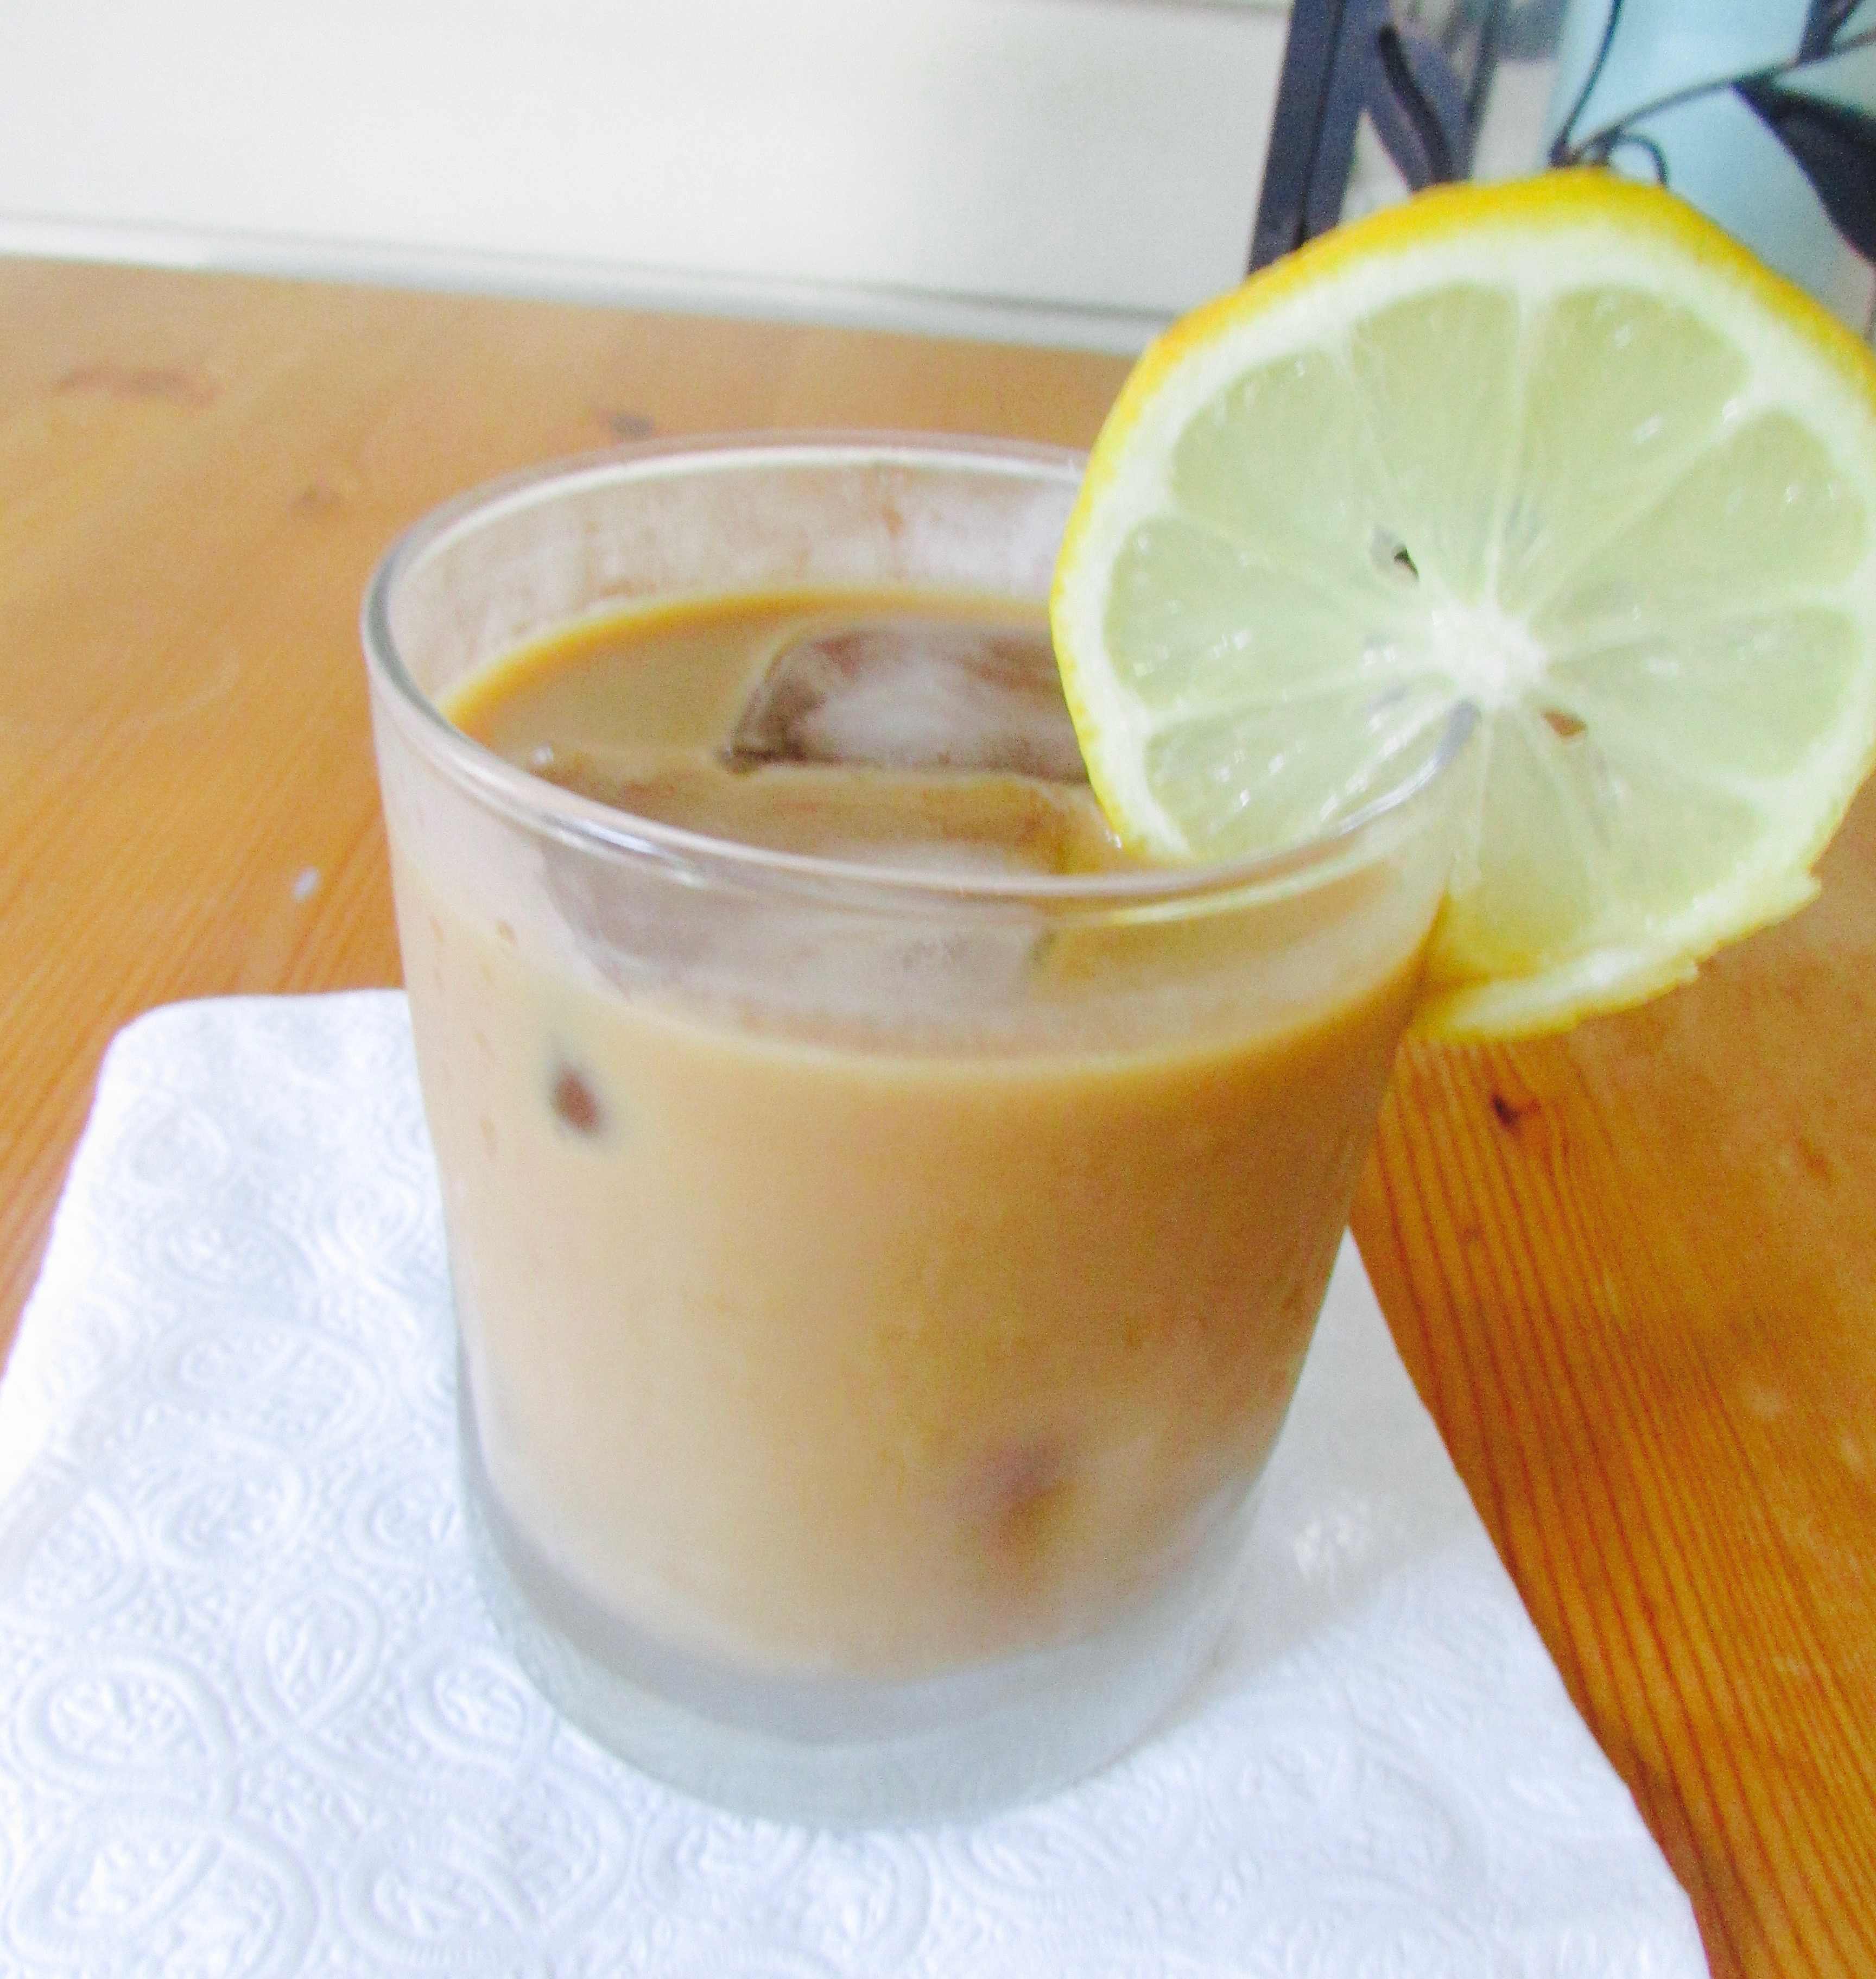
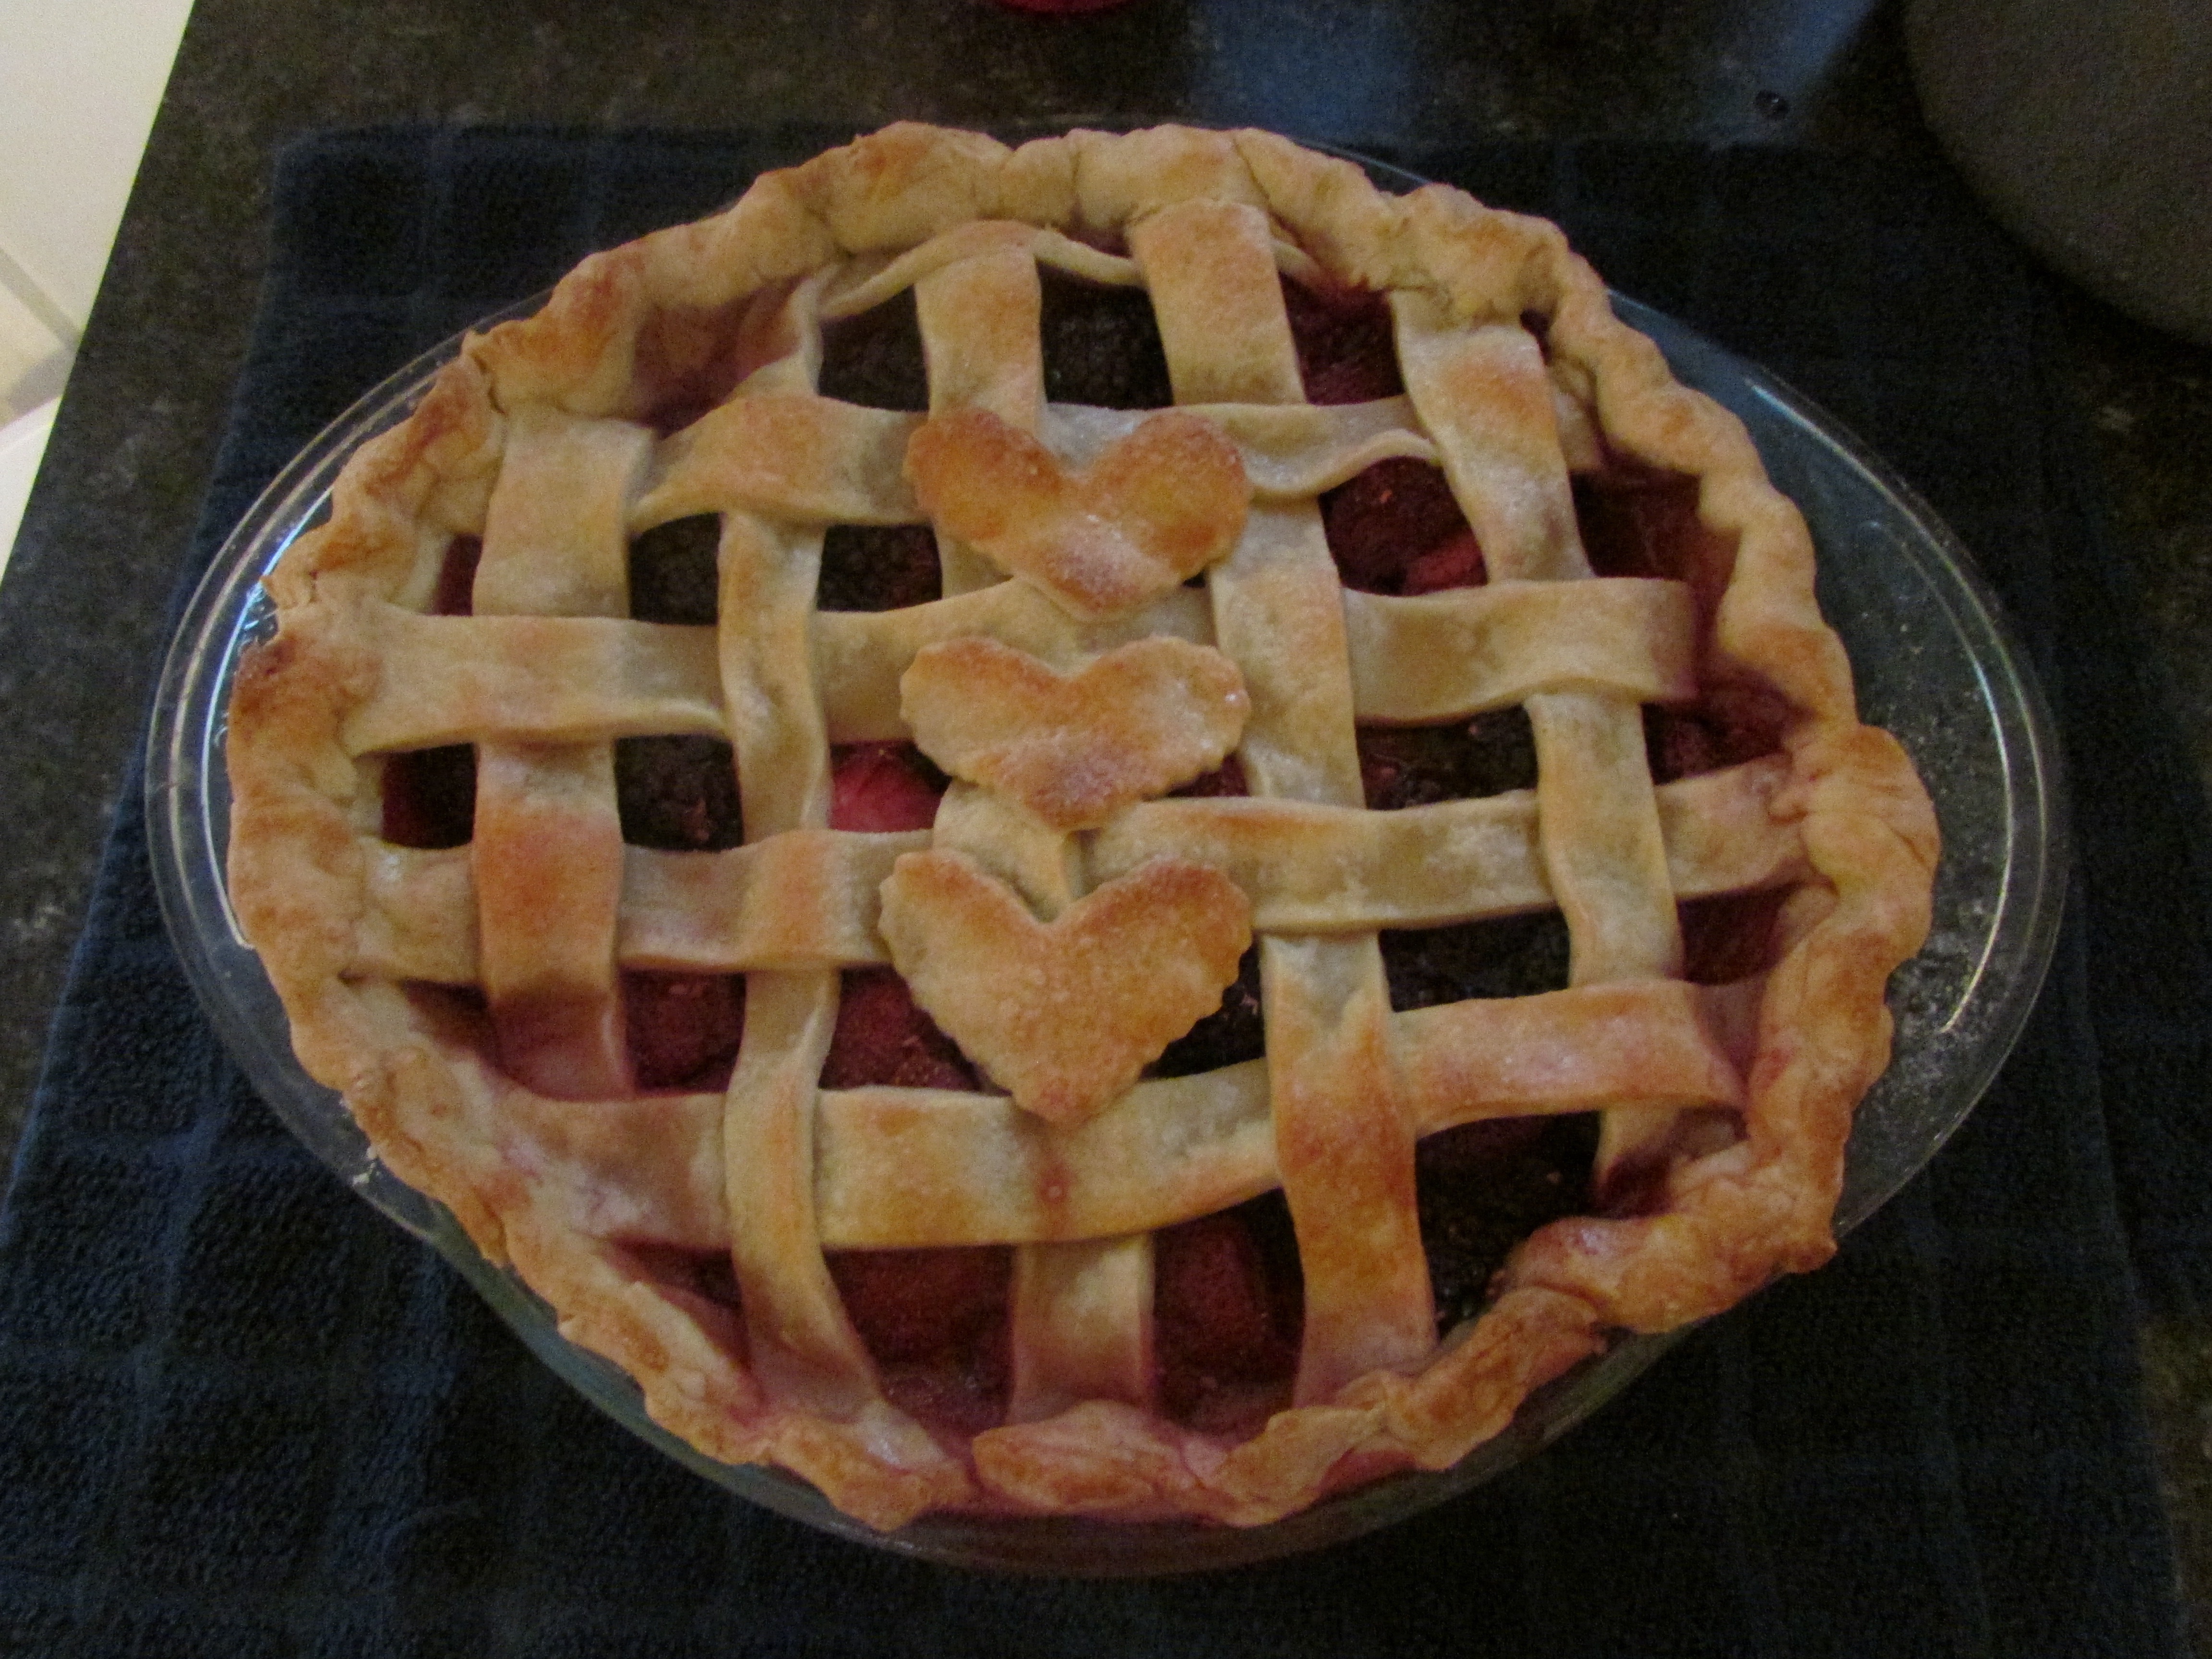
Allow to cool before cutting into the pie. Enjoy with some vanilla ice cream or whipped cream (or both)! And enjoy these last few weeks of summer before it’s all just a delicious memory… 🙂

Triple Berry Pie

Almond Cheesecake Brownies

IMG_1538
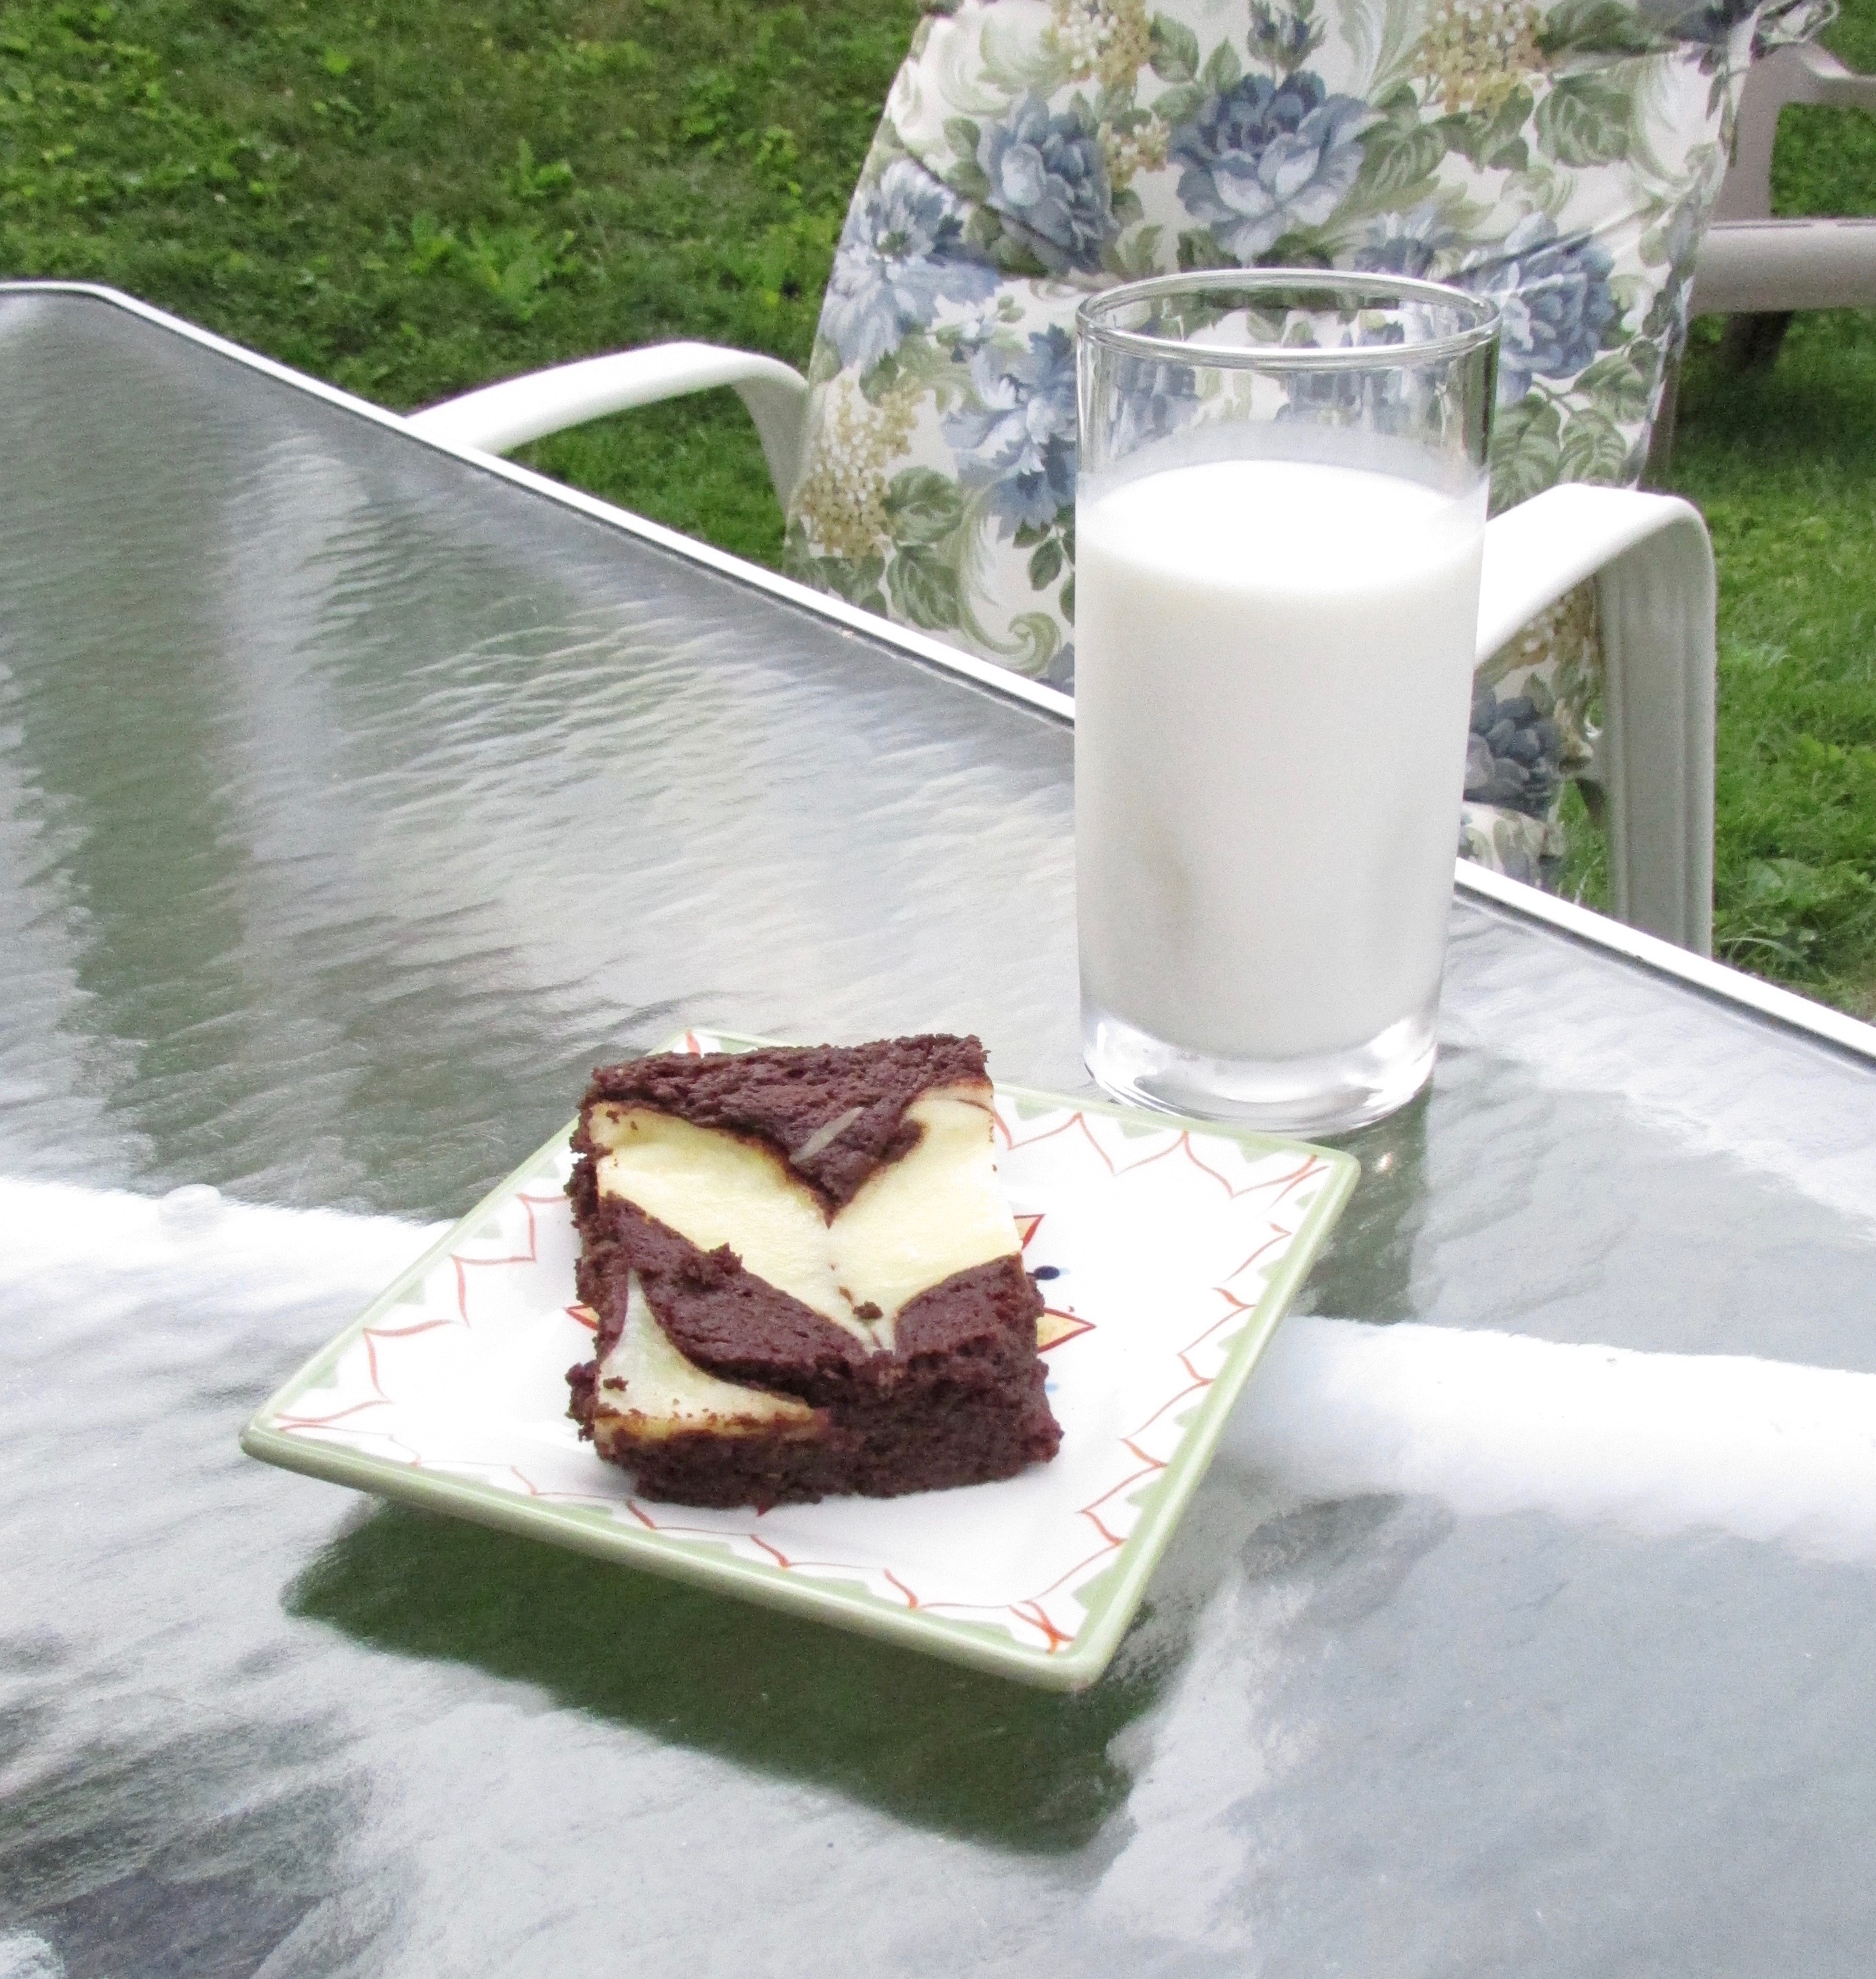
Almond Cheesecake Brownies. Oh. My. Heavens. These ARE Heaven.

There are a million brownie recipes out there. And to think, I used to believe that using the box mix was making them “from scratch” because you weren’t buying them already made at the store–HA! I’ve come a long way. 😉

I have a tried a number of brownie recipes over the years and I have my favorites. But when Randy told me he wanted me to make him brownies for Father’s Day, I knew it was time to write my own recipe. The request to incorporate cream cheese into the brownies came as well. Challenge accepted. I came up with a plan that was actually quite delicious! I decided to make a cheesecake batter to spread throughout the brownie batter. But the real kicker would be to incorporate Randy’s favorite dessert flavor–almond. So instead of vanilla extract in the cheesecake, I used almond extract. Win! Almond has a distinct and powerful flavor so generally, you don’t need that much of it. However, I did use 2 whole teaspoons in this recipe because the chocolate of the brownie is so rich that I didn’t want it to hide the almond flavor. But if you want a more subtle almond flavor, only use 1 teaspoon. And if you want to replace the almond extract altogether with vanilla, just use 1 teaspoon of vanilla. 😉

IMG_1541
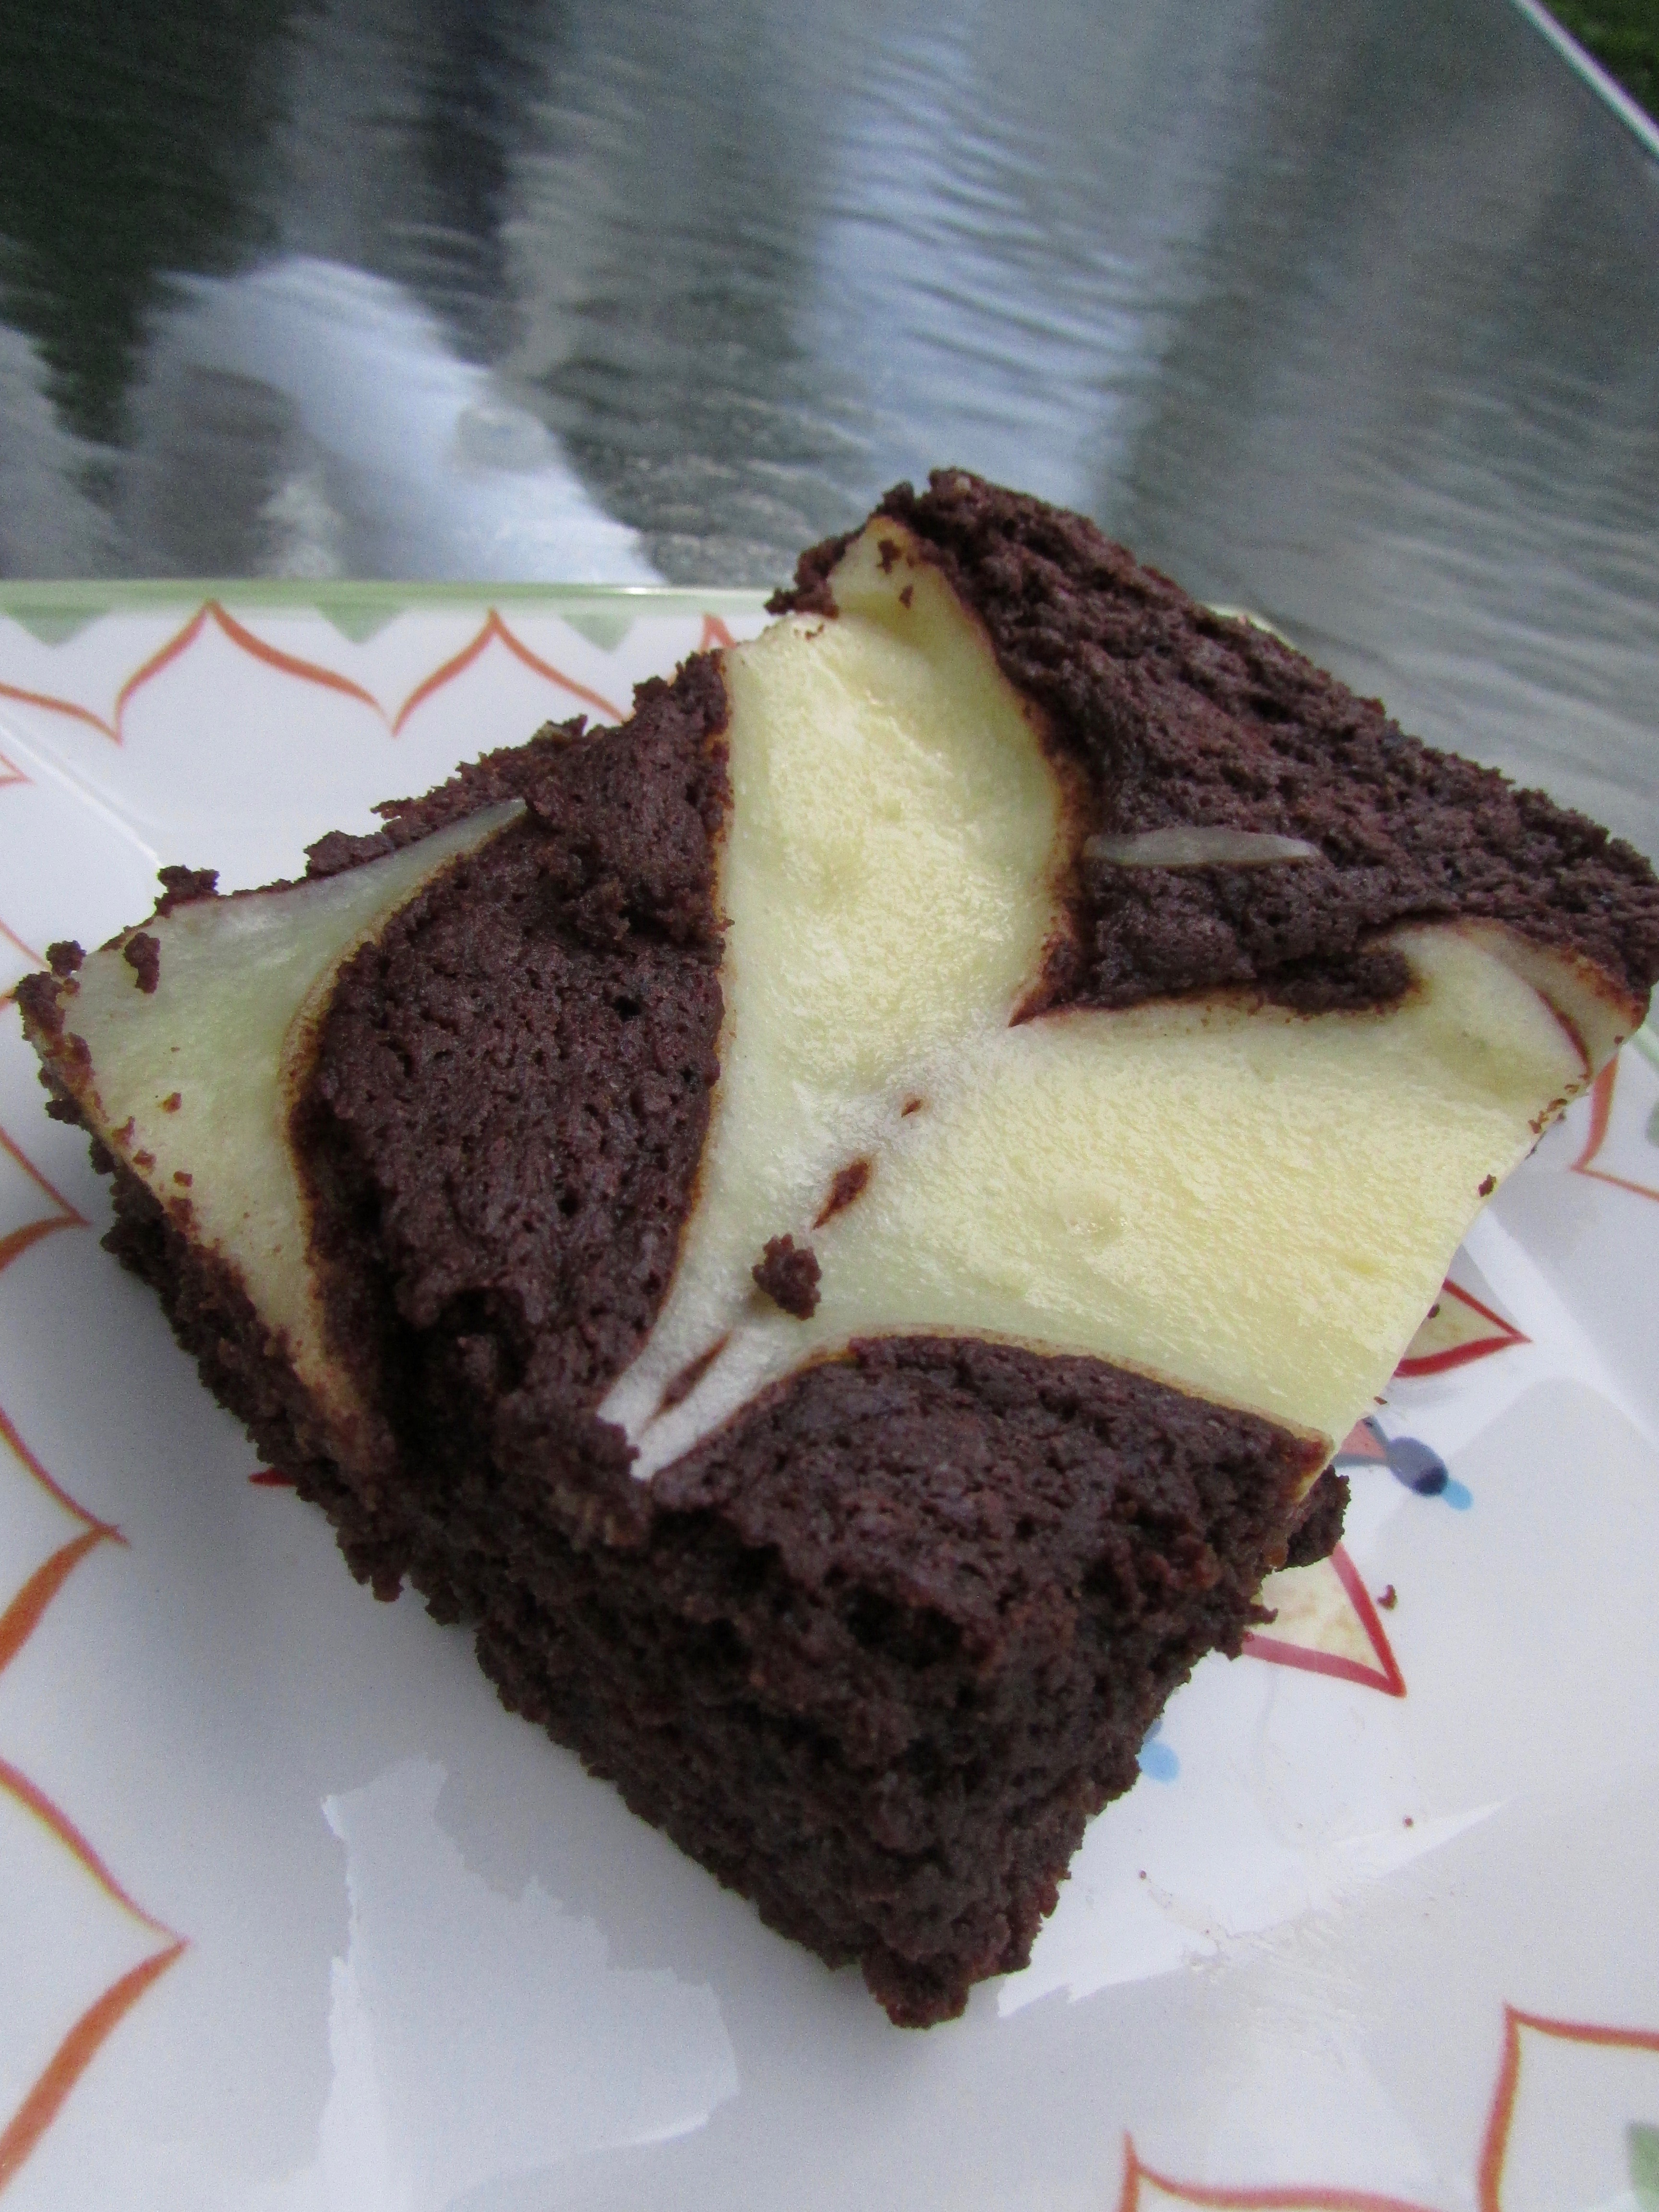
My recipe for these brownies comes together from a lot of tasty research. I wanted to put something together that was relatively simple, but also rich and decadent. And the inspiration, of course, comes from my one and only. 🙂

IMG_1540Grab a tall glass of cold milk and enjoy!

Almond Cheesecake Brownies

Brownies:

  • ½ lb butter
  • 8 oz. semi sweet chocolate chips
  • 4 oz. unsweetened chocolate
  • 3 eggs
  • 1 TB instant coffee
  • 1 TB vanilla
  • 1 ¼ cups sugar
  • ¾ cup flour
  • 1 ½ tsp. baking powder
  • ½ tsp. salt

 Cheesecake:

  • 16 oz. cream cheese, softened
  • ½ cup sugar
  • 2 eggs
  • 2 tsp. almond extract

Preheat the oven to 350*.

Over a double-boiler, melt the butter, the semisweet chocolate, and the unsweetened chocolate. Stir until smooth and allow to cool slightly.

In a large bowl, stir the eggs, coffee, vanilla, and sugar together.

Combine the chocolate and sugar mixtures and stir well.

Sift together the flour, salt, and baking powder and add to the chocolate/sugar mixture.

Pour batter into a greased 9×12 pan.

In a food processor, combine the softened cream cheese, sugar, eggs, and almond extract. Whip until smooth.

Add dollops of the cheese mixture into the pan of batter and spread or swirl together with a knife.

Bake 30-35 minutes.

Allow to cool slightly and then enjoy!

Here’s your handy printable! almond cheesecake brownies


IMG_1538

A Nod to the Ol’ Food Blog…

IMG_1433I haven’t posted about food in a while. Granted, I’ve been nauseous for the past 5 months, but I’ve also had a lot going on. And it takes a lot of effort to photograph food when you have three hungry kids plus a husband waiting to eat. I seriously don’t know how I used to write about food almost daily! And take pictures! I’m glad I don’t feel the weight of that blog journey anymore, but I do miss writing about and photographing food. There have been a few times the past couple of months when I’ve made something special and wanted to blog about it but just didn’t have the energy to try to capture a good picture and put the recipe into print. But I decided it was time. So I’m about to have a food-explosion blog post and hope you’re ready for it! 🙂

We’ve got some hot weather around the corner, and the changing of seasons always gets me excited about what new dishes I’m going to create in the kitchen that will satisfy the seasonal cravings. (Think: fruit pies, tarts, grilled food, pasta and potato salads! Yeah, summer!) I realize that cooking in the summer does not appeal to most people, even if you have air conditioning, so I wanted to share some of my tips to beat the heat and still provide a filling dinner for your family.

During summer, I love making a good pasta or potato salad because I can cook the pasta or potatoes early in the morning and assemble the salad before it gets too hot, and stick it in the fridge. Then, when my husband comes home from work, he can throw some meat on the grill (which he loves to do) and we have a perfectly hearty side to go with it and don’t have to heat up the kitchen! One pasta salad I’ve made quite a few times just in the last month, is my spring asparagus salad. It’s so refreshing and has a light oil/vinegar dressing rather than a creamy one, so it doesn’t weigh you down.

To make a classic potato salad (which I just made a couple days ago and planned to take a picture, but someone in the house ate the all the leftovers before I was able to stage an appealing photo–then told me to make sure I wrote about how it’s so good that you can’t leave it in the refrigerator unattended or it will be gobbled up…) I start by quartering a whole bag of red potatoes. Then I boil them just until fork-tender (about 15-20 minutes) and then drain and steam them under a towel for an additional 20 minutes. For the dressing, I combine just under a cup of mayonnaise, about a 1/4 cup of buttermilk, plenty of salt and pepper, and 2-3 TBs of freshly chopped dill*. When the potatoes are cool enough to handle but still warm, I cut them up and add them to the dressing. I also add a quarter of a red onion, chopped, and about 2 stalks of celery, chopped. As you can see, I’m not one to do a lot of measuring these days, so I apologize if you prefer exact measurements. The onion and celery can be added “to taste” depending on how much crunch you want in your salad and how much you like the taste of onion or celery. If you want some real specific measurements, Ina Garten has a few potato salad recipes with exact measurements and they’re pretty fool-proof!

IMG_1442*
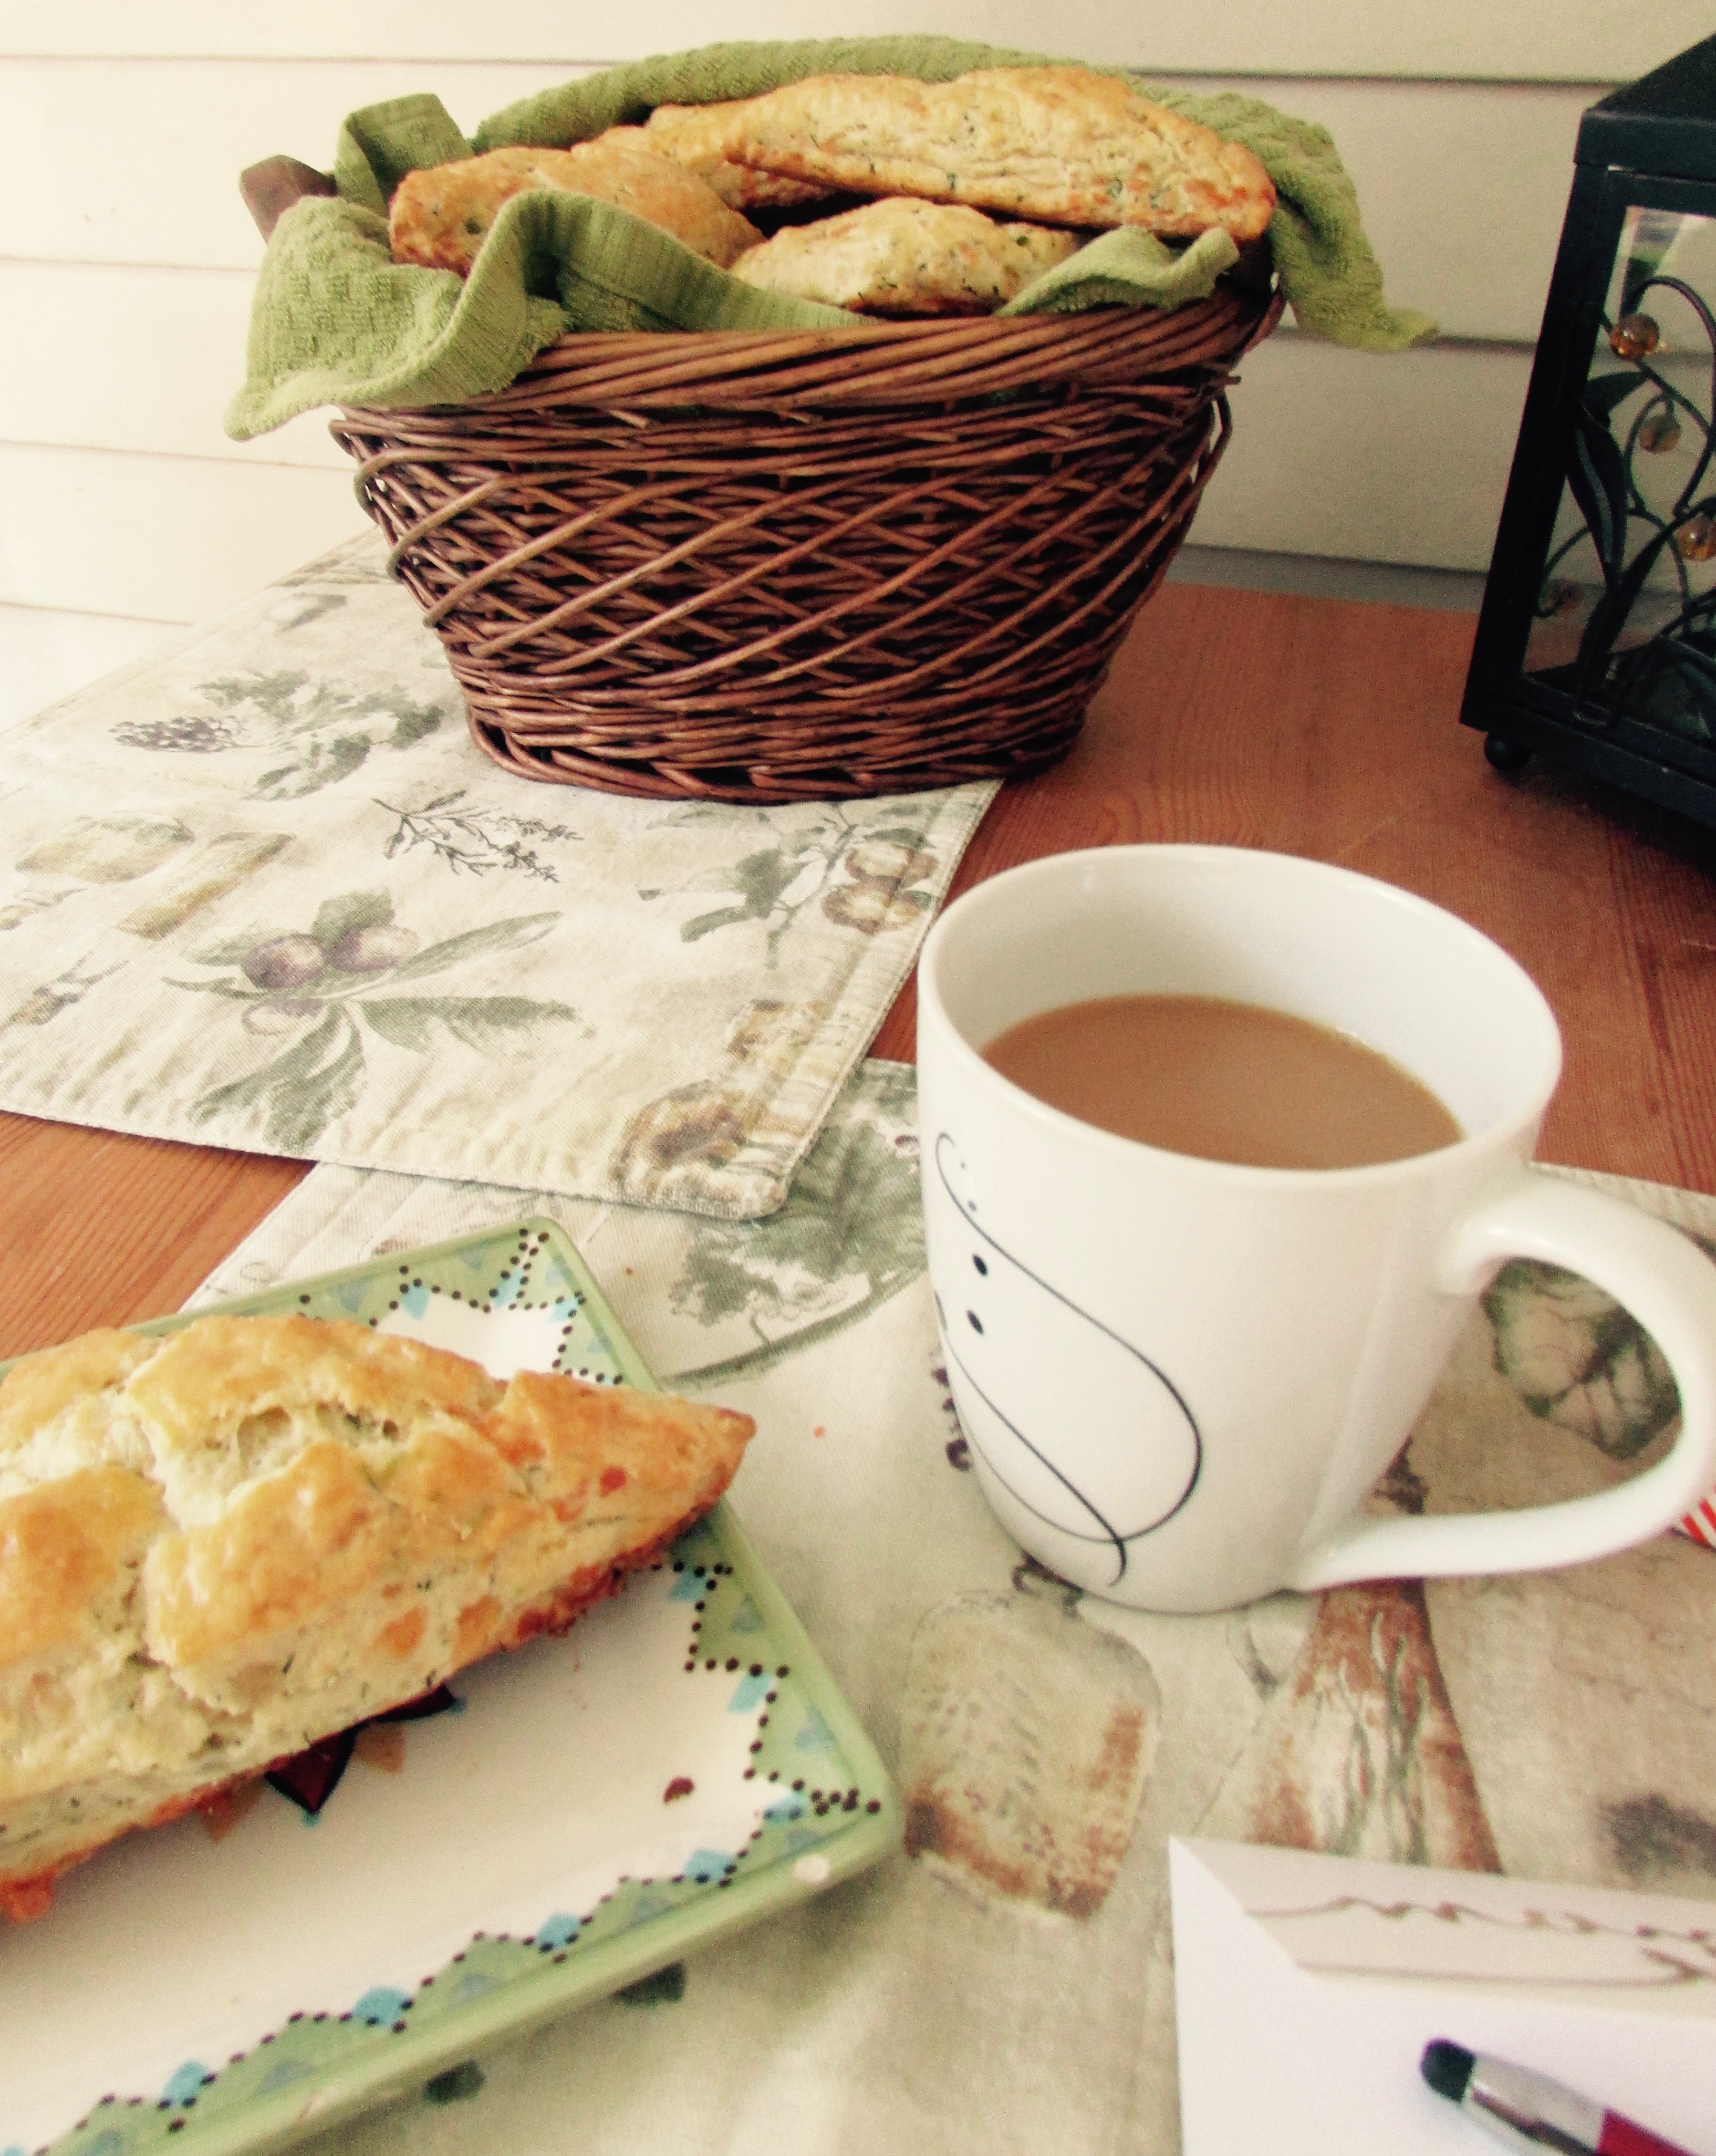
What else can you do with fresh DILL?! You know that pesky ingredient that you only bought to go with that one recipe and now you have leftovers of it in your fridge and you don’t know what to do with it? Unless you’re really into pickling your own cucumbers, dill can be like that. I do make a lot of potato salad in the summer, so I generally grow dill in my garden, but we’ve had such cool weather until now, I haven’t started the garden yet! Ina Garten has a recipe for cheddar-dill scones which is a scrumptious way to use up that dill! The recipe calls for a full cup of chopped dill, but you certainly don’t need that much, you’ll still get some of the flavor with less of the herb.

IMG_1438
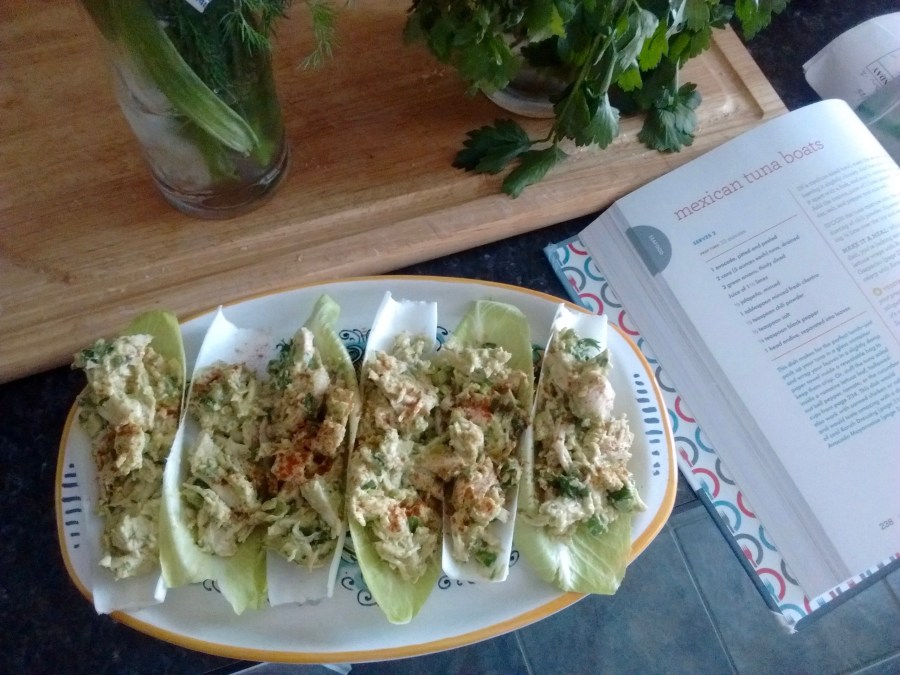
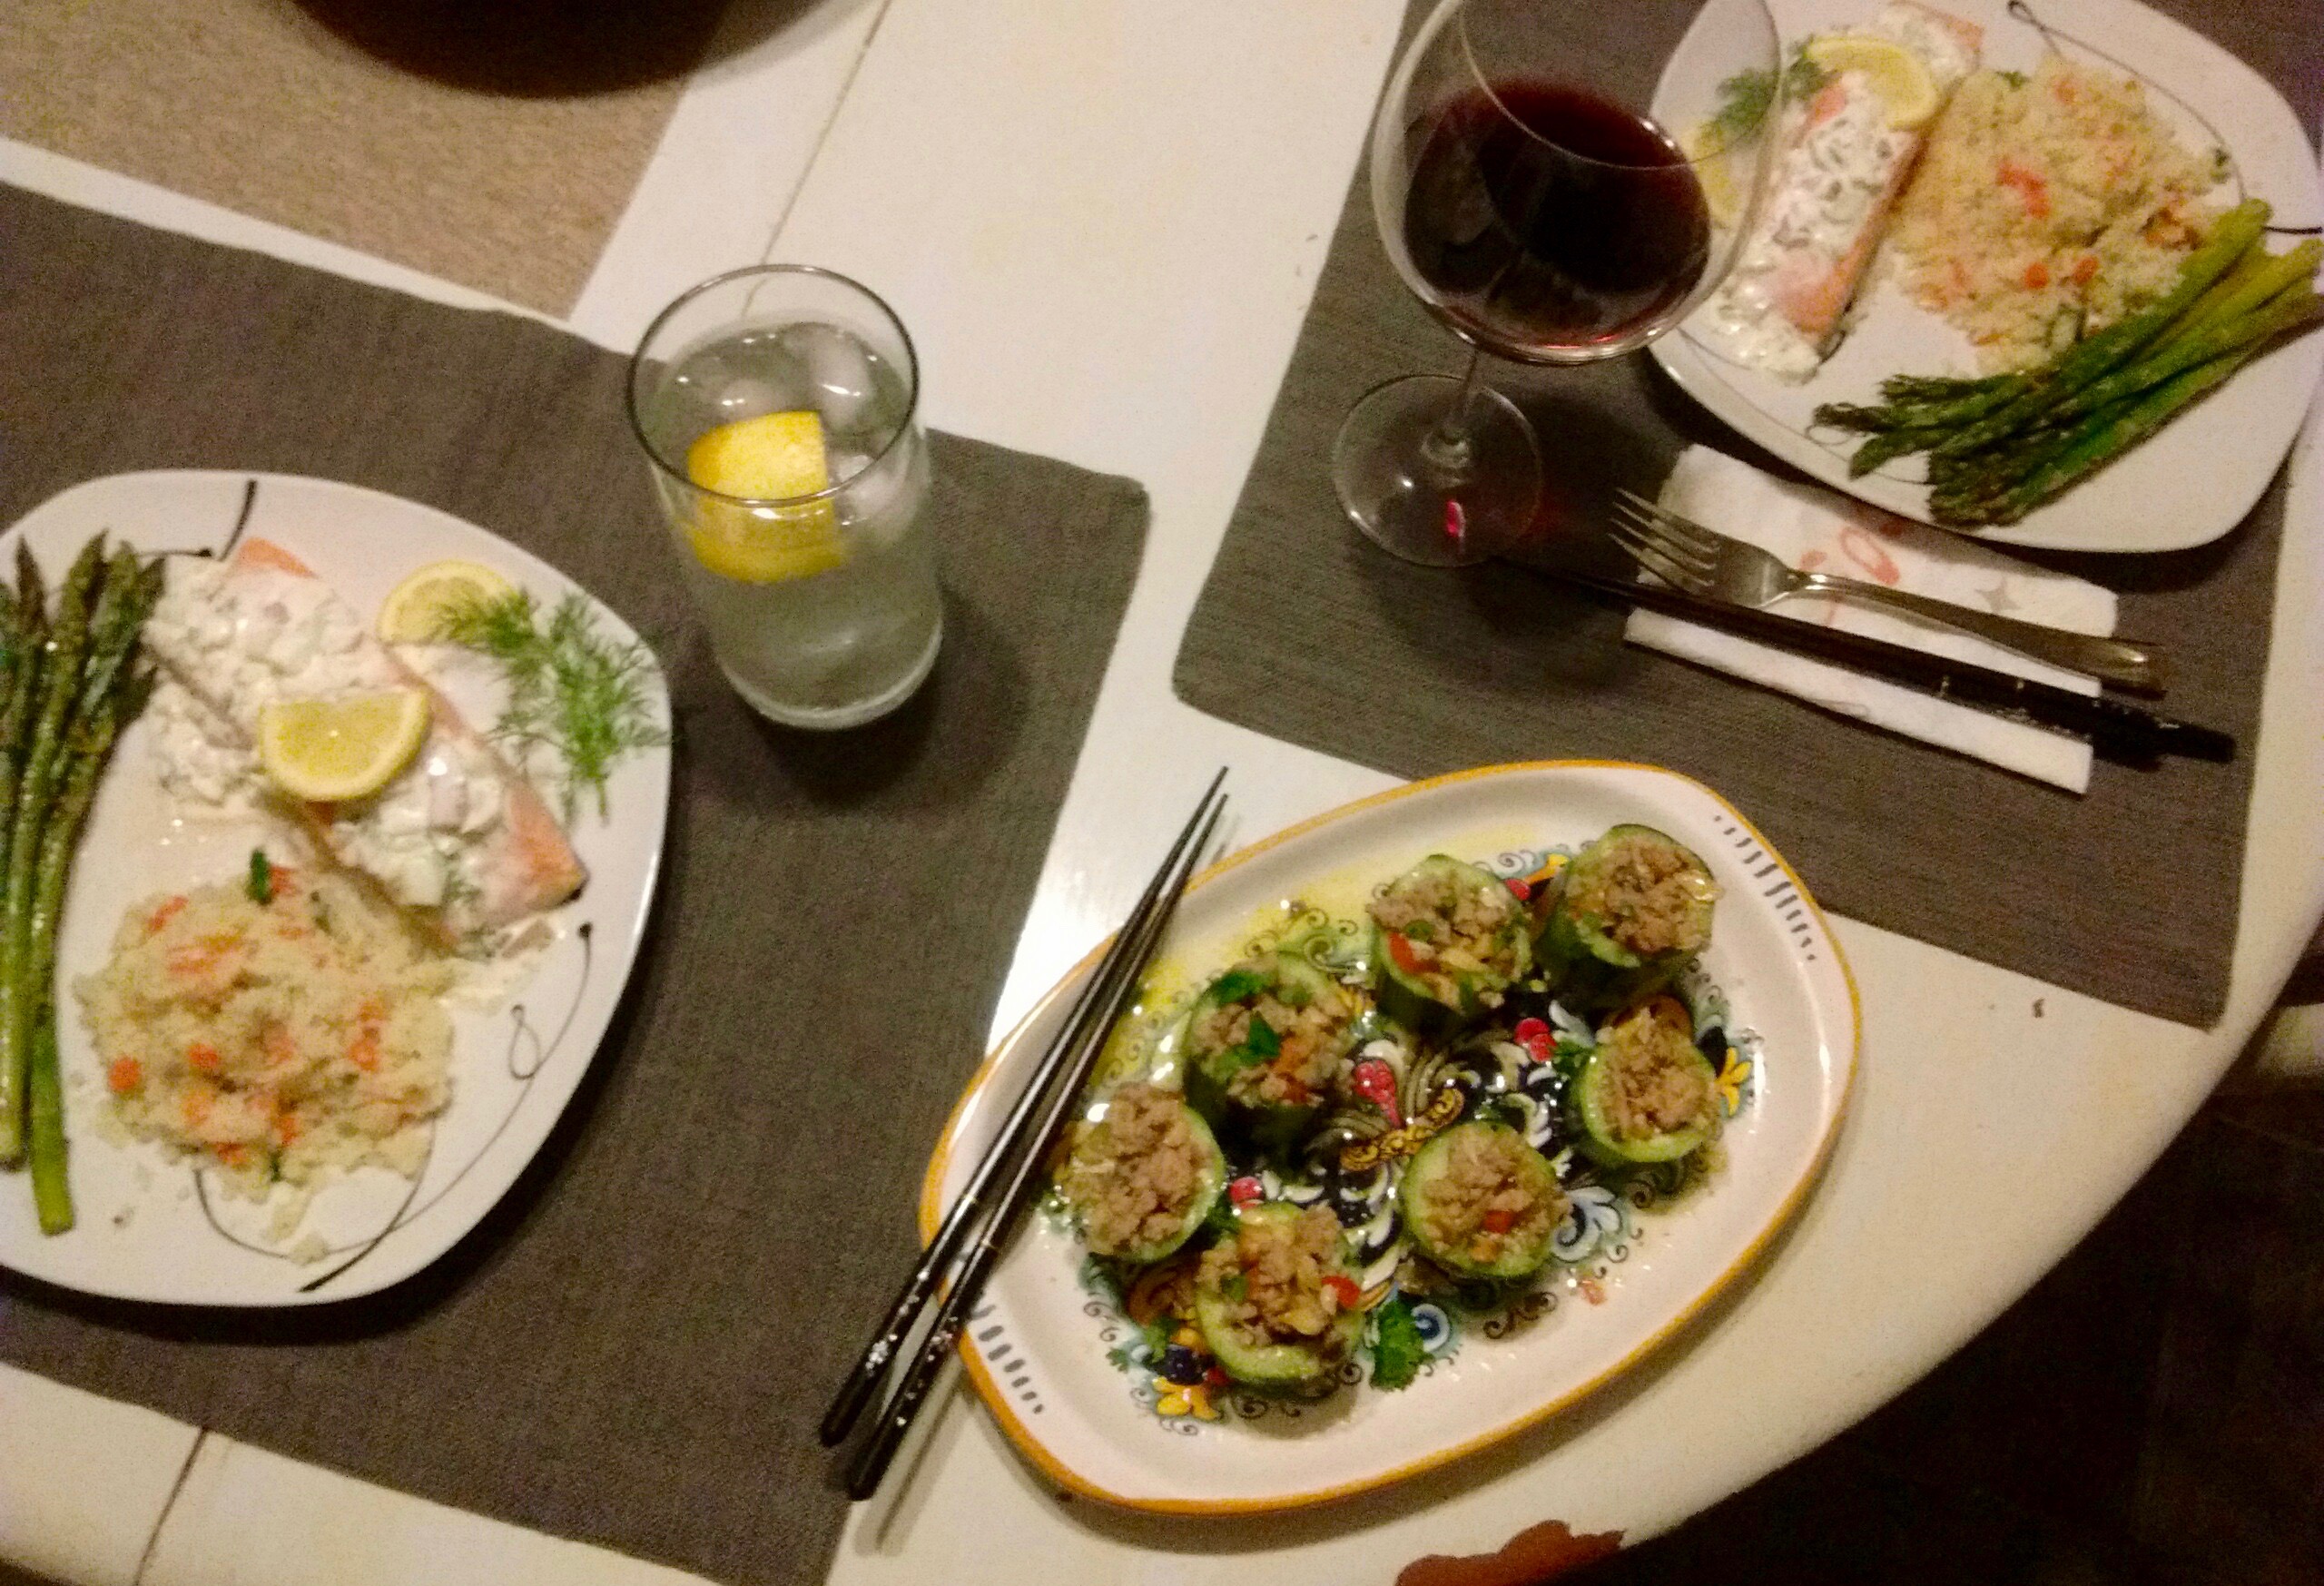
So I also thought I’d share some of our dinner plans for the week. I try to meal plan in order to save money at the grocery store and stay organized throughout the week. The links to these recipes all take you to my old food blog, which is still active, though I never use it. There are TONS of recipes on there, so you might see more than one thing to try! And if you’re looking for food ideas in the sweltering heat, here are a few options…

I work on Mondays and usually pick up my groceries (LOVE Hannaford To-Go!) on my way home, so dinner needs to be relatively simply. Temps are in the 90s today so we’re sticking with a HEARTY pita-pocket salad and watermelon. NO OVEN! 😉 Tomorrow night we’ll be grilling up some pork ribs, I’ll make a potato salad early in the morning to serve at night and we’ll try out some corn on the cob. I know it’s early in the season, but I couldn’t resist! Wednesday the temps should be a little cooler, so the stove is going back on but we’re still keeping it simple: cheese and pepperoni stromboli with a Greek salad.  Thursday, we’ll have chicken caesar sandwiches, and Friday I’m serving up Western pizza! Simple dishes to get us through the work-week. This weekend is Father’s Day weekend so it’s all about what Randy wants to eat! (But let’s be honest, it almost always is anyway–he’s my true inspiration for cooking.) But specifically for this weekend, he’s requested a veggie garden pizza lunch, steak tips supper, and on Sunday, my famous carbonara with caesar salad (and my homemade dressing) and bruschetta for his after-church dinner. Oh, and I’m also supposed to make homemade brownies with a twist–I’ll fill you in after I decide how good his idea comes out. 😉 Whew! A viewer once asked the Food Network’s Pioneer Woman (Ree Drummond) if she had any tips for starting a food blog and she said to buy a treadmill! I can totally relate–haha! I did gain some weight while doing that year-long food blog of mine so now I have to be smarter about how I balance my meals and activity because so far, my love of cooking hasn’t died down. Hopefully you enjoy this weather and have some inspiration for future summer meals and check out my old blog–whenever I randomly stop by, I still get inspired to make something I haven’t made in a while!


Is there TIME for that?

Can I just say, I LOVE our homeschool curriculum! It’s seriously awesome. There are many things to love about a curriculum, but one thing I’m thankful for today is the amount of time that’s allotted for free exploration, and fun, hands-on activities. This curriculum does a great job making room for “margin space” in homeschool life. I’m in a moms’ Bible study and last night we were talking about how much margin we leave in our lives for the unexpected, or the “fun” stuff that can present itself when we’re not prepared for it. Are we expecting the unexpected? Are we leaving enough margin in our daily schedules to allow for hiccups, or for playing with our kids even when we have other things to do? Do we have enough margin for things to take longer than expected and not get upset over it? These are questions we had to ask ourselves. It’s a struggle for me, sometimes. I’m a planner, but I’m working hard to not be an over-planner. I’m learning the value in saying “no” and leaving enough margin in my schedule. Although I typically start my day with some sort of plan for how it will go, I’m now asking God daily to give me the grace to accept and embrace the changes that come–the ones I haven’t planned for.

I’m the type of mom who searches for ways to make learning fun and to incorporate all the senses when possible. I love doing crafts, experimenting in the kitchen, and enjoying our tasty experiments! I love exploring outside when we can. So I love that our curriculum includes an “exploration day” every week (also helpful when the week doesn’t go quite as planned–there’s a cushion day). And I love that it schedules in fun, interesting, hands-on activities throughout the week that go with what we’re learning (like having a family Sabbath celebration, or measuring Noah’s ark in cubits, or using clay and toothpicks to build our own “Tower of Babel”). I like that I don’t have to come up with all the fun and interesting stuff as “add-ins” because they’ve already included a bunch for me!

IMG_20170427_121427722So today, after a week of beginning to learn to tell time, we made a clock pizza! And it was scheduled right into our curriculum. I happen to have a fruit pizza recipe that is better than the suggestion given (which used actual pizza crust, whereas mine uses a sugar cookie crust–yum!) so I used that and we made an educational and delightful treat! Nice to have the time to do these things together. 🙂 Doesn’t mean the whole day was perfect or that on other days, we don’t get to the fun part that I’m looking forward to, but today was a gift. And no matter what comes, planned or unplanned, tomorrow will be, too.

*The curriculum we use is My Father’s World. I fell in love with it at a homeschool convention 2 years ago. I wouldn’t be so bold to say it’s a perfect curriculum, but it’s perfect for us, right now. You can check it out here: mfwbooks.com

IMG_20170427_121029268This FRUIT PIZZA is a great dessert for any spring/summer gathering and is SUPER easy to make. Even a pretty nauseous pregnant lady with 3 little kids running around can whip it up in no time.

IMG_20170427_121232446I use Pillsbury sugar cookie dough for the crust. They come in squares, now, so I lay them all out on a greased pizza stone and then roll them together using powdered sugar instead of flour to prevent sticking. Then I bake according to the package instructions, but usually have to add a few more minutes since we’re making one giant cookie, here!

For the “sauce”:  – 8 oz cream cheese (softened), 1 TB vanilla, 1 TB milk, 2 TB apricot preserves, 1/2 cup confectioners sugar, drizzle of honey. Whip together with a hand mixer until smooth.

Spread the “sauce” over the cooled cookie, and then decorate with fruit! Today I used blueberries, sliced strawberries, and sliced kiwis. Sometimes I add grapes. Blueberries made great numbers for our clock. What a fun snack for all of us!

IMG_1342